
Private Slack channels are a game-changer for team communication, providing a secure space for confidential discussions and collaboration.
But how do you create and manage these channels effectively? We’ve got you covered with step-by-step instructions on how to make a Slack channel private, tips, and troubleshooting advice to help you harness the power of private Slack channels for improved team communication.
Key Takeaways
- Create and manage private Slack channels on desktop, web browser, or mobile app platforms.
- Easily add/remove members with up to 1,000 capacity for effortless collaboration.
- Adjust permissions & use a professional tone & threads for efficient communication management.
Step By Step To make a Slack channel private
Making a Slack channel private is an uncomplicated process, but understanding the necessary steps for each platform is key.
Be it the desktop app, web browser, or mobile app, we will walk you through the process to help you comfortably create and manage private channels.
Desktop App
To create a private Slack channel using the desktop app, follow these steps:
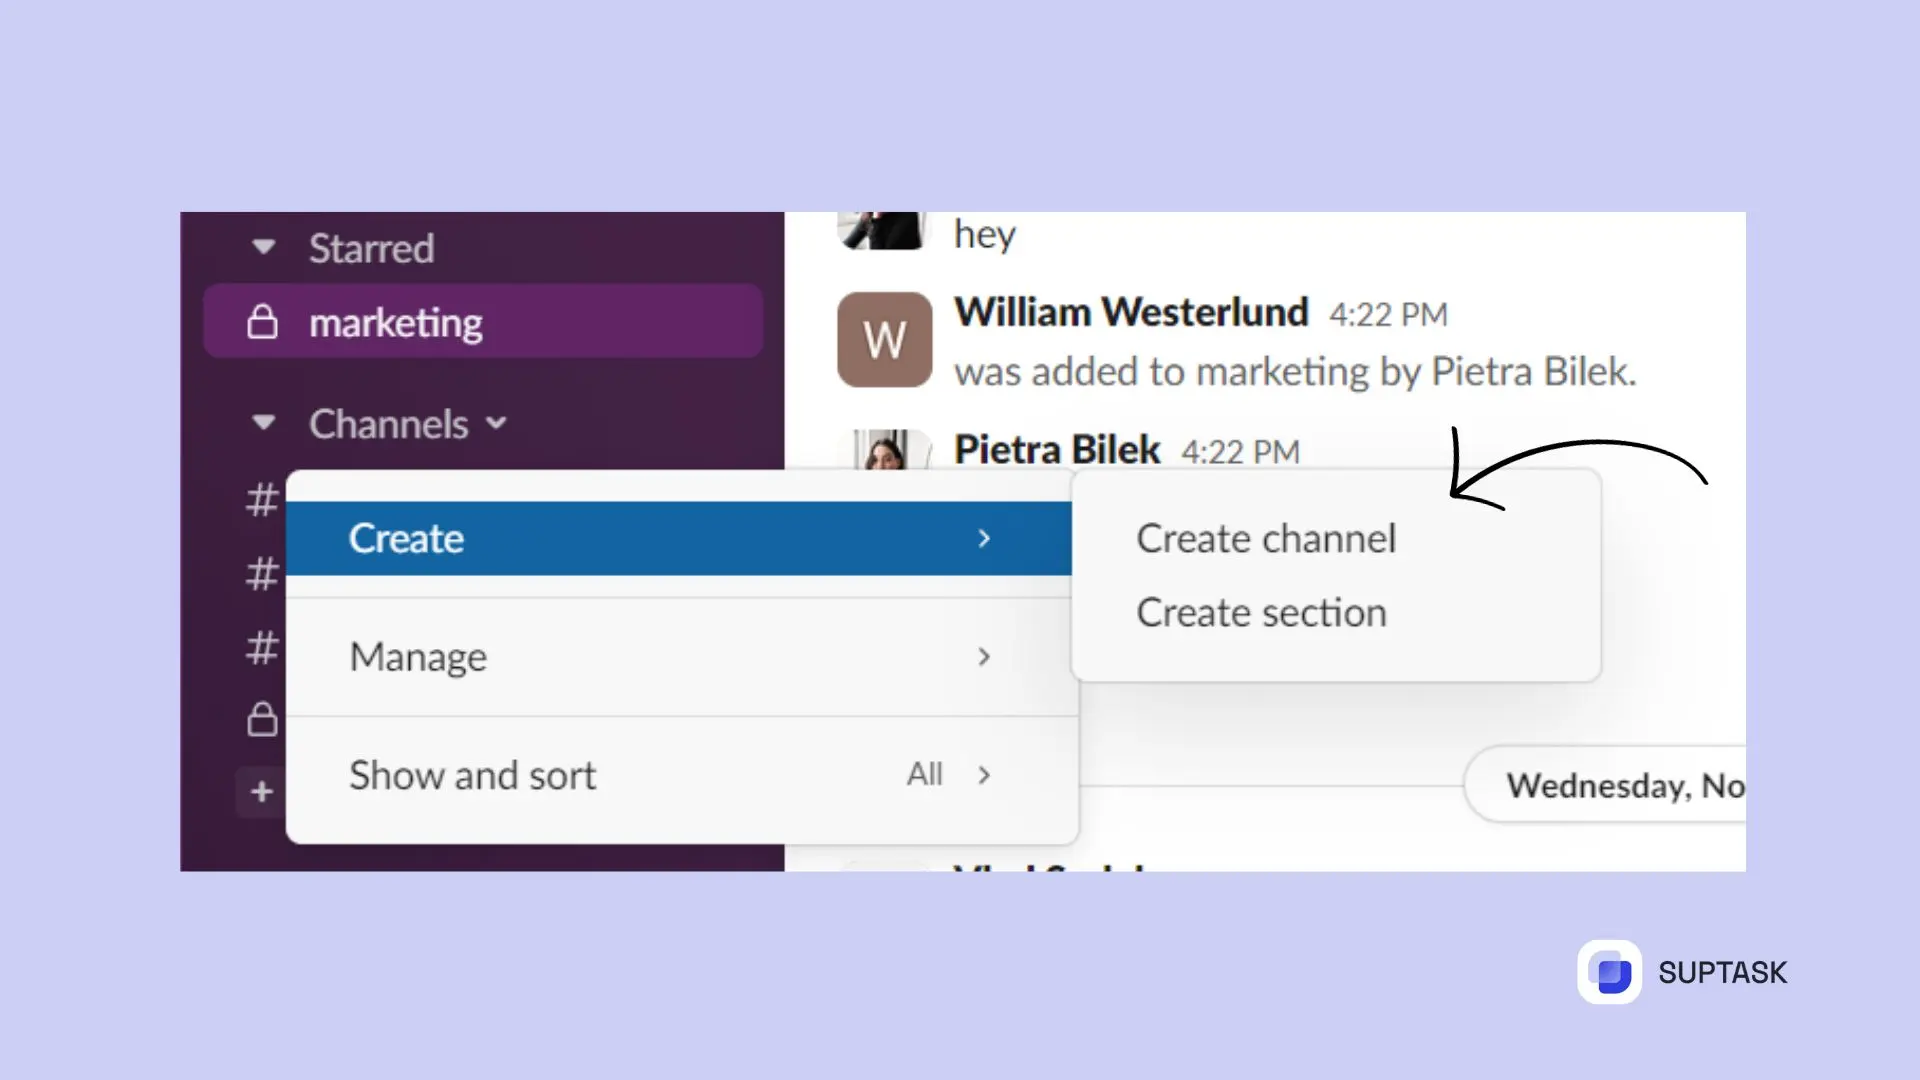
1. Click on the ‘Add channels’ option.
2. Select ‘Create a new channel’.
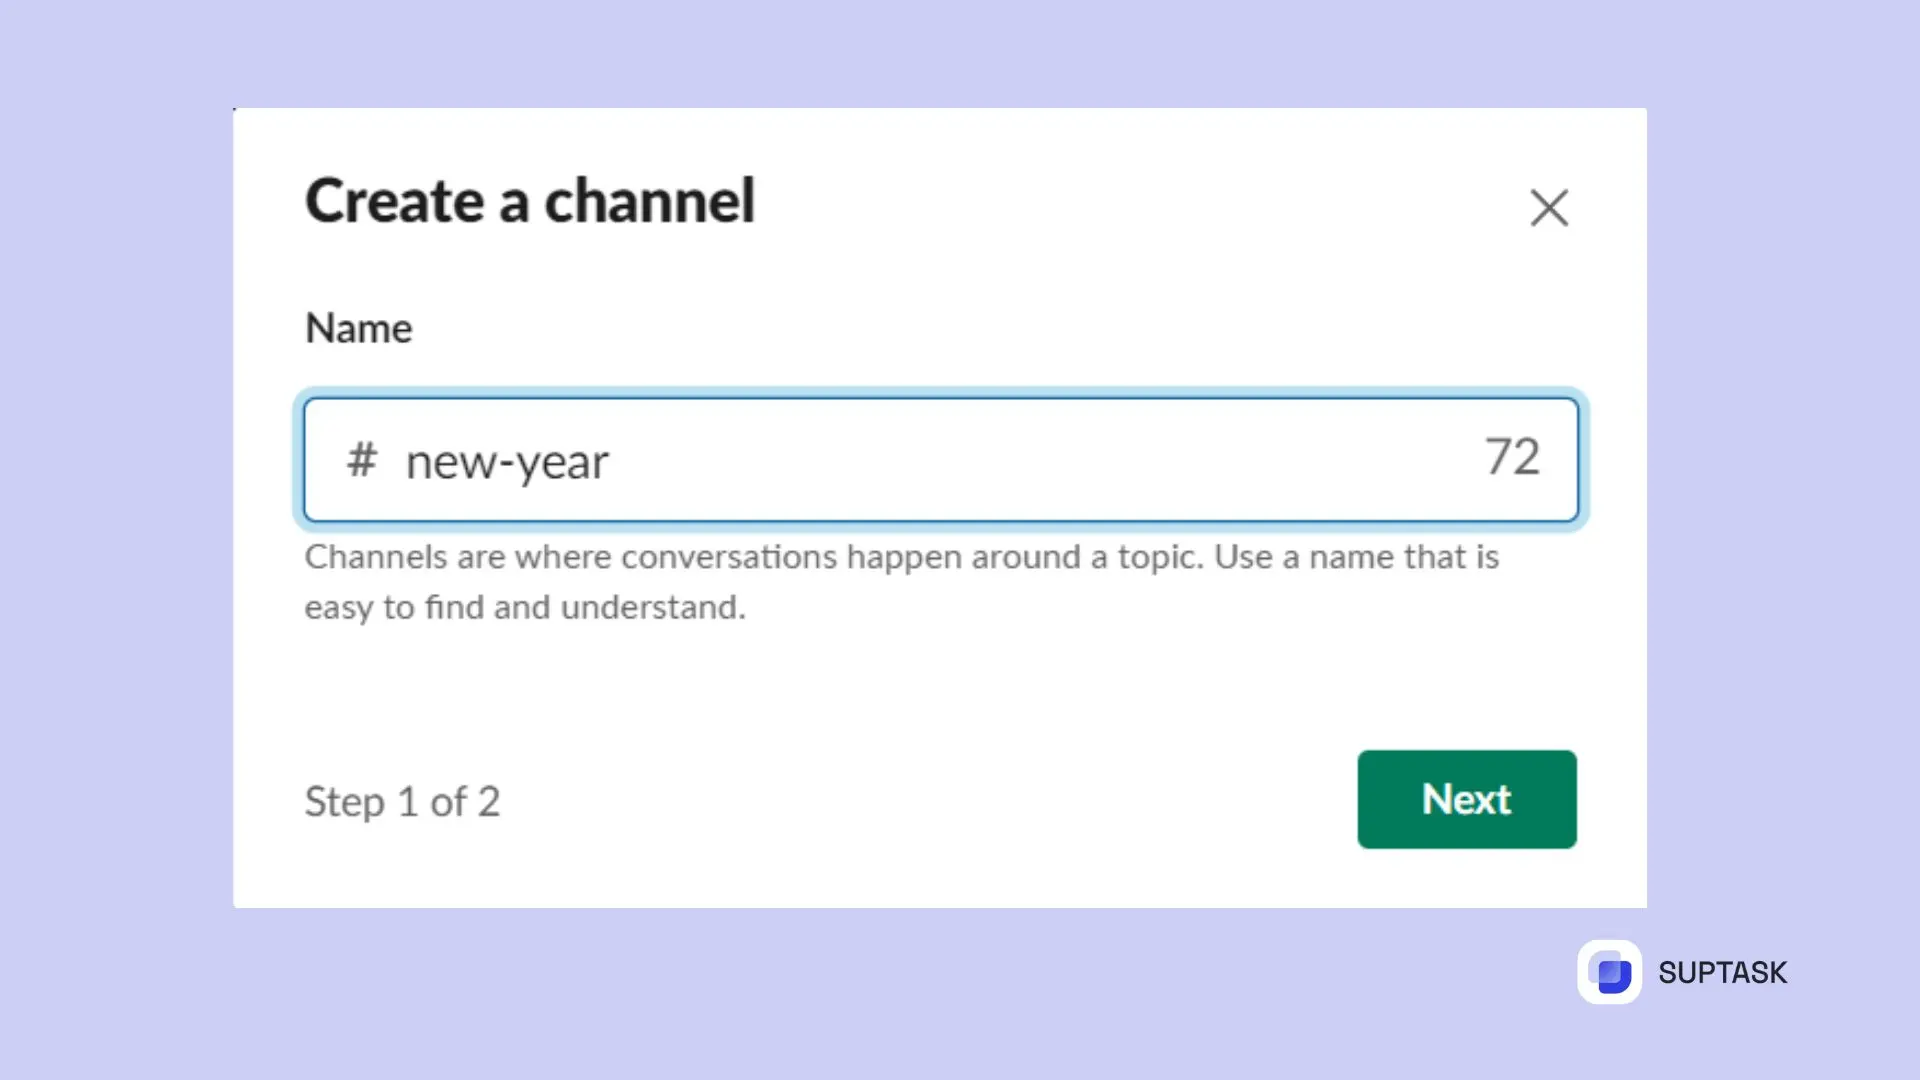
3. Enter the channel name.
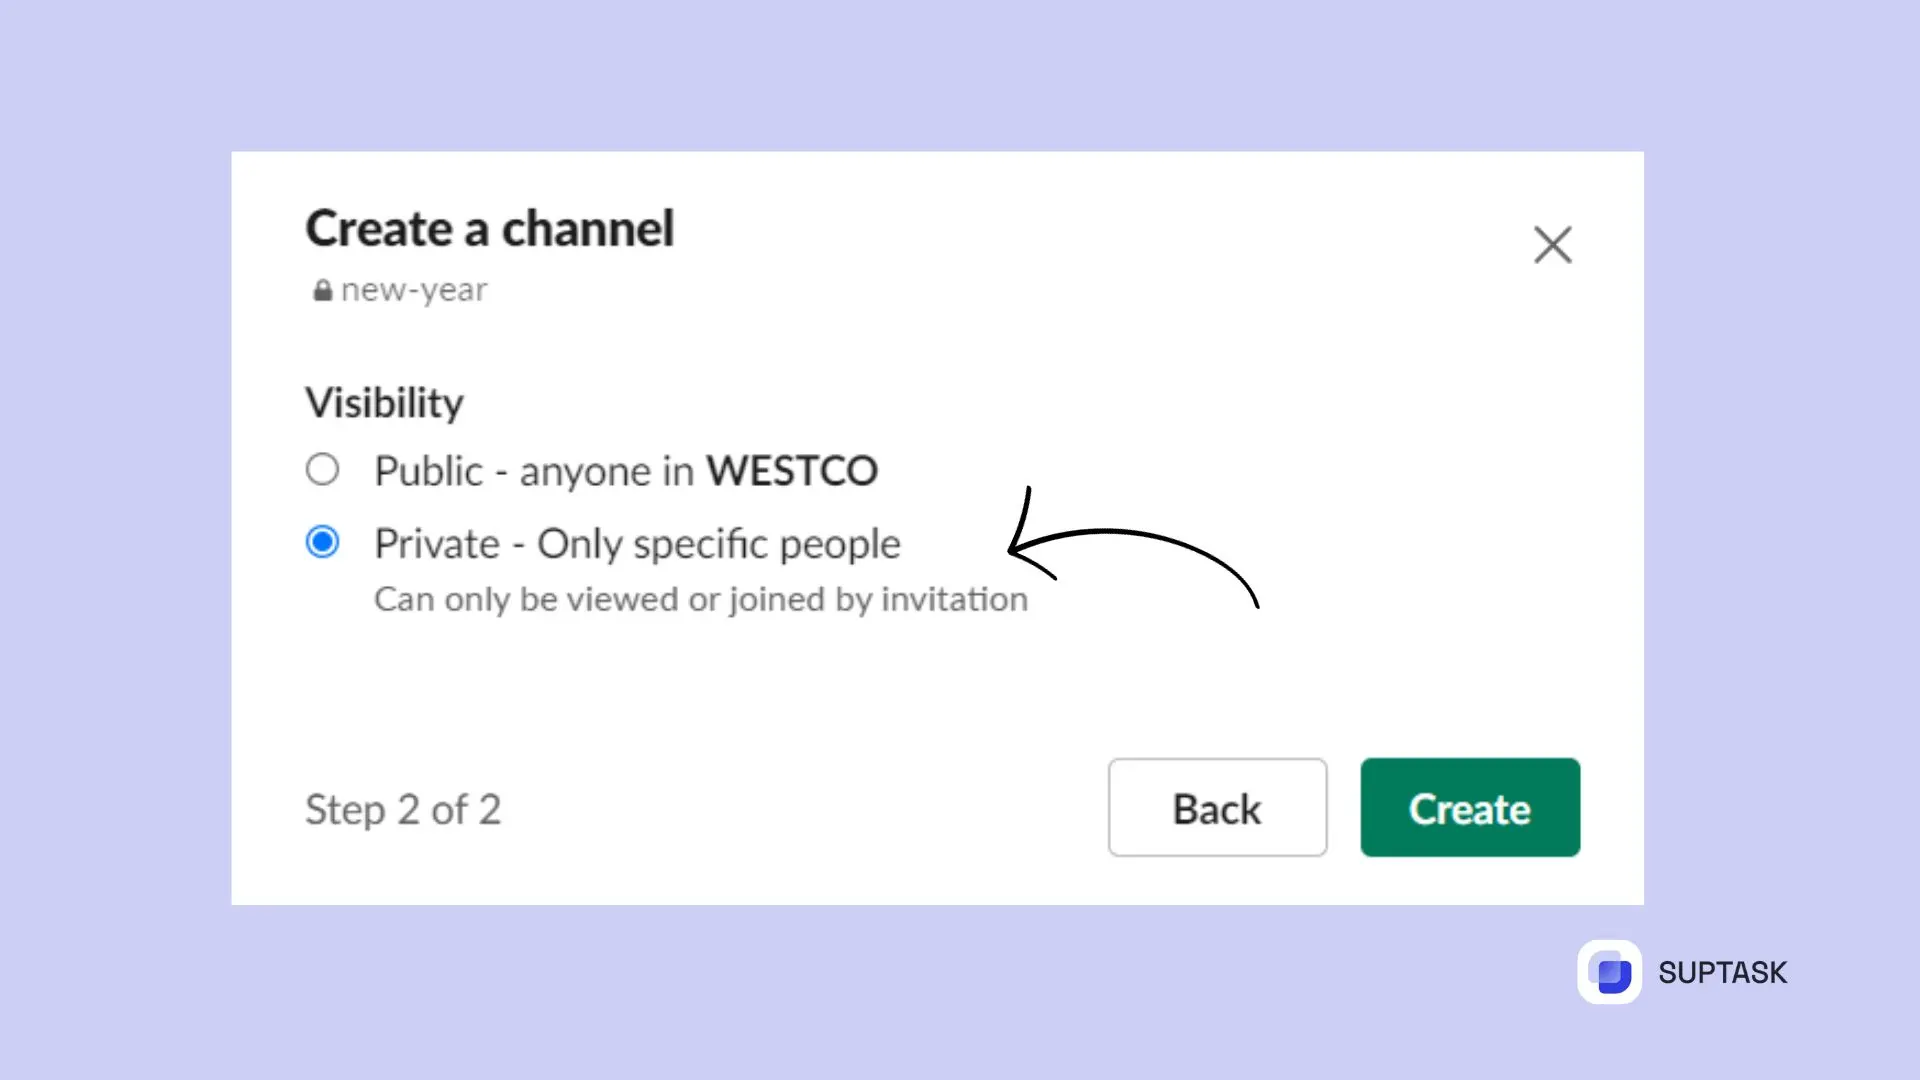
4. Toggle the switch next to ‘Make Private’ to ensure the channel is private.
5. Click ‘Create Channel’.
6. Your new private channel will now appear in your list of channels, marked with a lock icon to denote its private status.
Want to add folk to your hidden channel? Simply select the channel title, then ‘Add people’. Search by name to include these people. Only admins and owners can tweak a channel's privacy, so make sure you've got the right access before going private.
Turning a public channel into a private one is pretty straightforward. Follow these steps:
- Use the Settings & Administration in the Slack desktop app.
- Hit your workspace name on the top left.
- Pick 'Settings & administration' from the dropdown menu.
- Listen to on-screen instructions to adjust privacy settings.
Web Browser
Using a web browser to make a channel private is simple. Here’s the low-down:
- Fire up Slack in your browser and find the channel to privatize.
- Click the channel’s title up top to see its profile.
- Click 'Edit Channel Details'.
- Select ‘Change to Private’.
- When asked, confirm this change and your channel goes incognito.
Need to add or evict people from a private channel in your browser? Same game plan as the desktop app. Click the channel name, then ‘Add people’ to enlist. To remove, find their profile and select ‘Remove from channel’.
Using the App
You can't alter an existing channel’s settings on the mobile app. But, you can make a new private Slack channel. Here's how to do it:
- Open the Slack app.
- Hit ‘Add Channel’.
- Name the channel.
- Flip the ‘Make Private’ switch.
- Press ‘Create Channel’.
You've now created a private channel on your device. You have separated your talks from the rest of the channel. Your private channel keeps your discussions safe and sound.
Guiding Members in Private Slack Channels
It's crucial to manage members correctly in private Slack channels. It keeps conversation safe and effective. We will explain how to add or remove members and change permissions. And all of this will speed up your team's work.
How to Include Members
You can easily add members to a private Slack channel. To do it, click on the channel name at the top, then choose ‘Add people’. Search and select members as needed. A private Slack channel allows up to 1,000 members, so there's plenty of room for teamwork.
It's good to know that you can add members even if you're not the channel owner. This flexibility makes collaboration smoother, and lets anyone who needs access join right away.
Removing Members
Removing members from a private Slack channel is just as simple. Here’s how to do it:
- On the desktop app, type ‘/remove @[member]’ in the message field to remove a member.
- For the mobile app, open the Slack app, select the private channel, locate the number of people in the channel on the top-right corner, and click on the element displaying the number of people and their avatars.
- Identify the member you want to remove, click on their avatar, select the option to remove the member from the channel, and confirm the removal when prompted.
Remember that when a member is removed from a private Slack channel, they will no longer be able to access the channel or its content. They will need to be added back to rejoin and participate in the channel’s activity.
Adjusting Permissions
Managing permissions in a private Slack channel allows you to maintain a secure and efficient communication environment. To adjust admin permissions in a private Slack channel, follow these steps:
- Navigate to the left sidebar and click on ‘Administration’.
- Select ‘Manage permissions’.
- Locate the private channel you wish to adjust admin permissions for.
- Click on the channel name to open the settings.
- Find the section for ‘Posting permissions’ and click on it.
- Finally, modify the admin permissions according to your preferences.
Modifying permissions in the settings tab allows you to maintain a secure and orderly workspace by ensuring only the relevant members have access to specific channels.
Tips for Efficiently Using Private Slack Channels
Using private Slack channels efficiently can significantly boost team communication and collaboration. Here are some strategies to maximize the utility of your private channels:
- Utilize threads to keep conversations organized and easy to follow. Click the three dots icon on a thread reply and select ‘Send reply to this channel’ to link a response to a prior post or answer someone’s query without disrupting the ongoing conversation.
- Be succinct and straightforward when composing messages. Break up longer messages into smaller sections and use bullet points for improved readability. Incorporating emojis and GIFs can add a personal touch to messages and make them more engaging.
- Use Saved Items and Pinned Messages to keep important messages easily retrievable. Saved Items can be used as a checklist for tasks that require attention, while Pinned Messages can emphasize essential messages that should be visible to all.
Troubleshooting Common Issues with Private Slack Channels
Private Slack channels are highly beneficial for team communication, yet occasionally, you may experience technical problems. Some frequent issues encompass:
- Connectivity troubles
- Audio and video glitches
- Integration difficulties
- Problems with usernames, mentions, and notifications in both private and public slack channel.
If you face any of these issues, consult Slack’s help center or contact their support team for assistance.