
How To Create A Slack Channel : Step-By-Step
Want to enhance your team’s interactions and teamwork? Learning to construct a Slack channel can be a powerful method to organize chats and streamline project tasks inside your Slack help desk.
This blog post will walk you through the methods for making and managing Slack channels, whether you’re operating on a desktop or a mobile gadget.
Key Takeaways
- Discover how to build a Slack channel for your group on desktop and mobile gadgets.
- Adjust settings, control members, switch between public/private channels and archive or remove them when required.
- Boost conversation with unified ticketing for efficient workflows & enhanced productivity.
How to Make a New Slack Channel on Your Desktop
To do that, follow these steps:
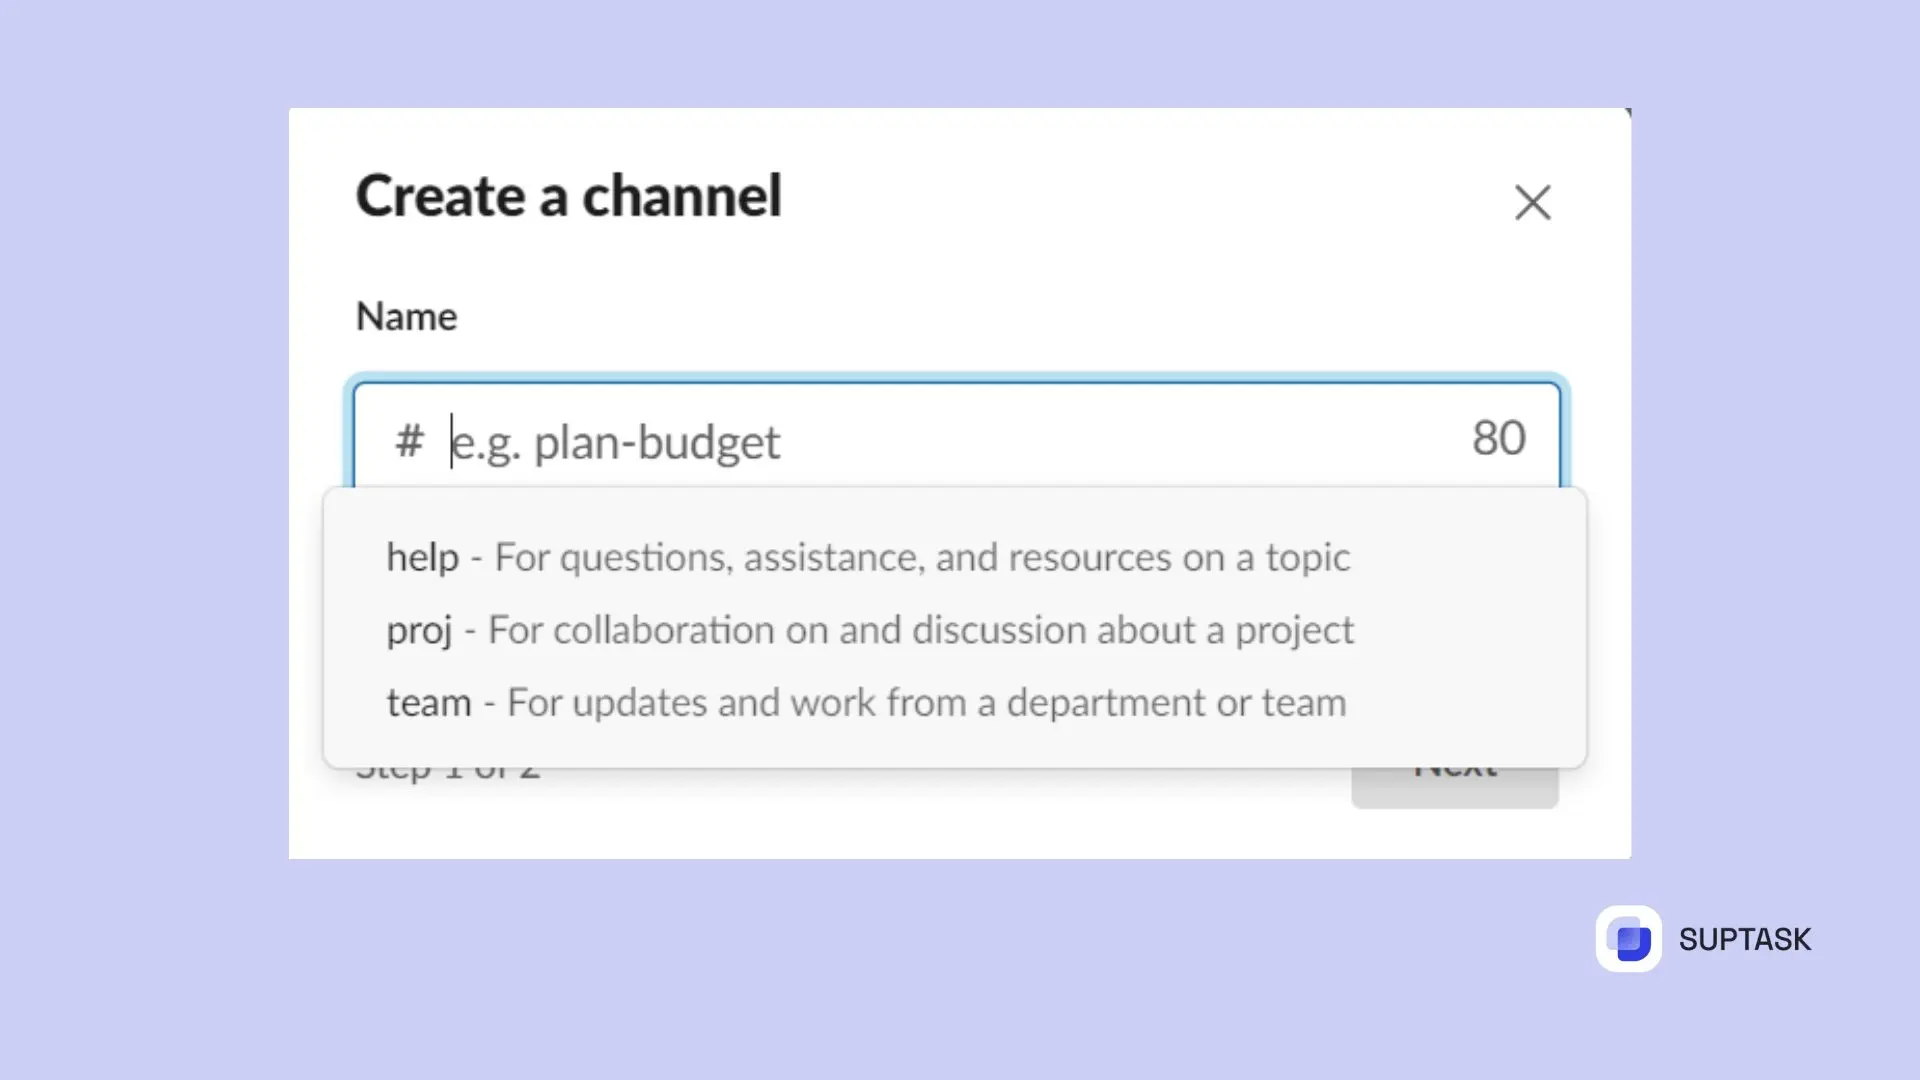
1. Click on the "+" sign next to "Channels" in Slack.
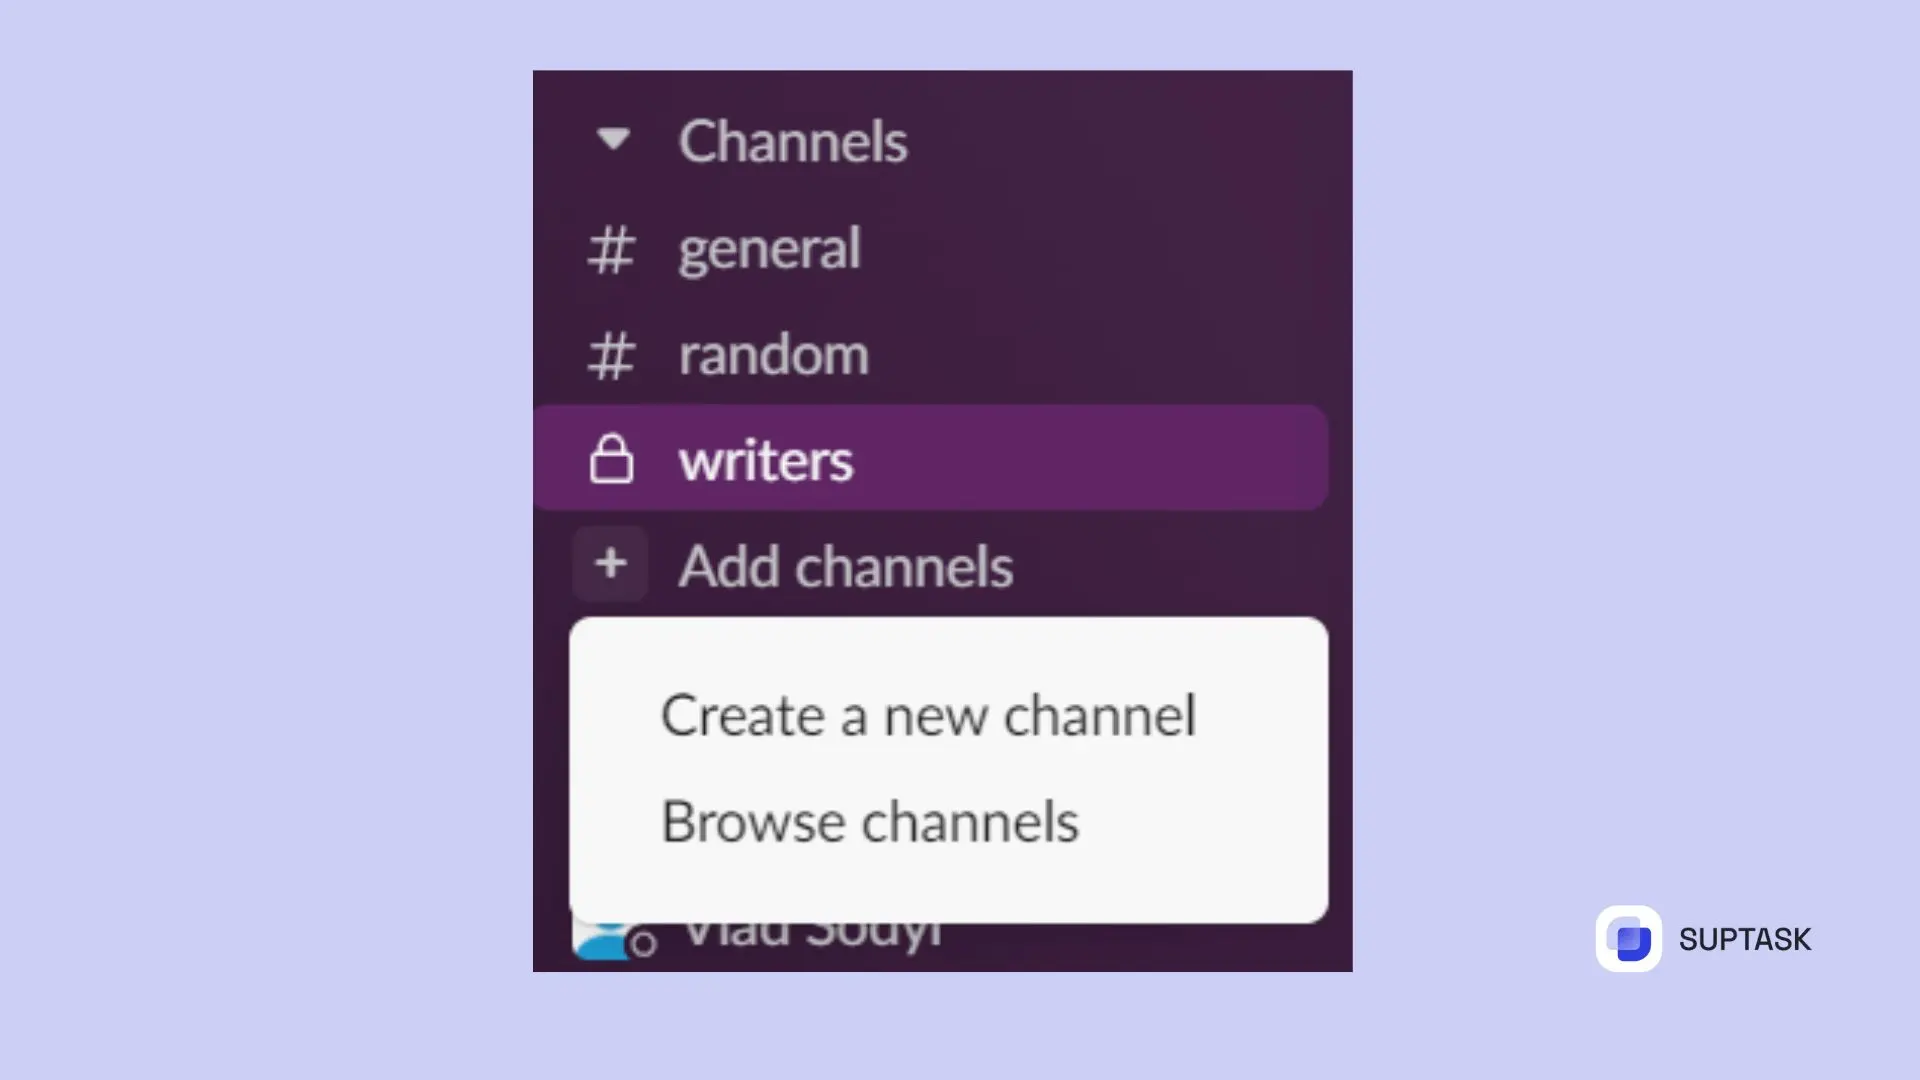
2. The "Create a channel" window appears. Unique, please. And describe it if you fancy.
3. Want it private? Toggle the "Make private" switch.
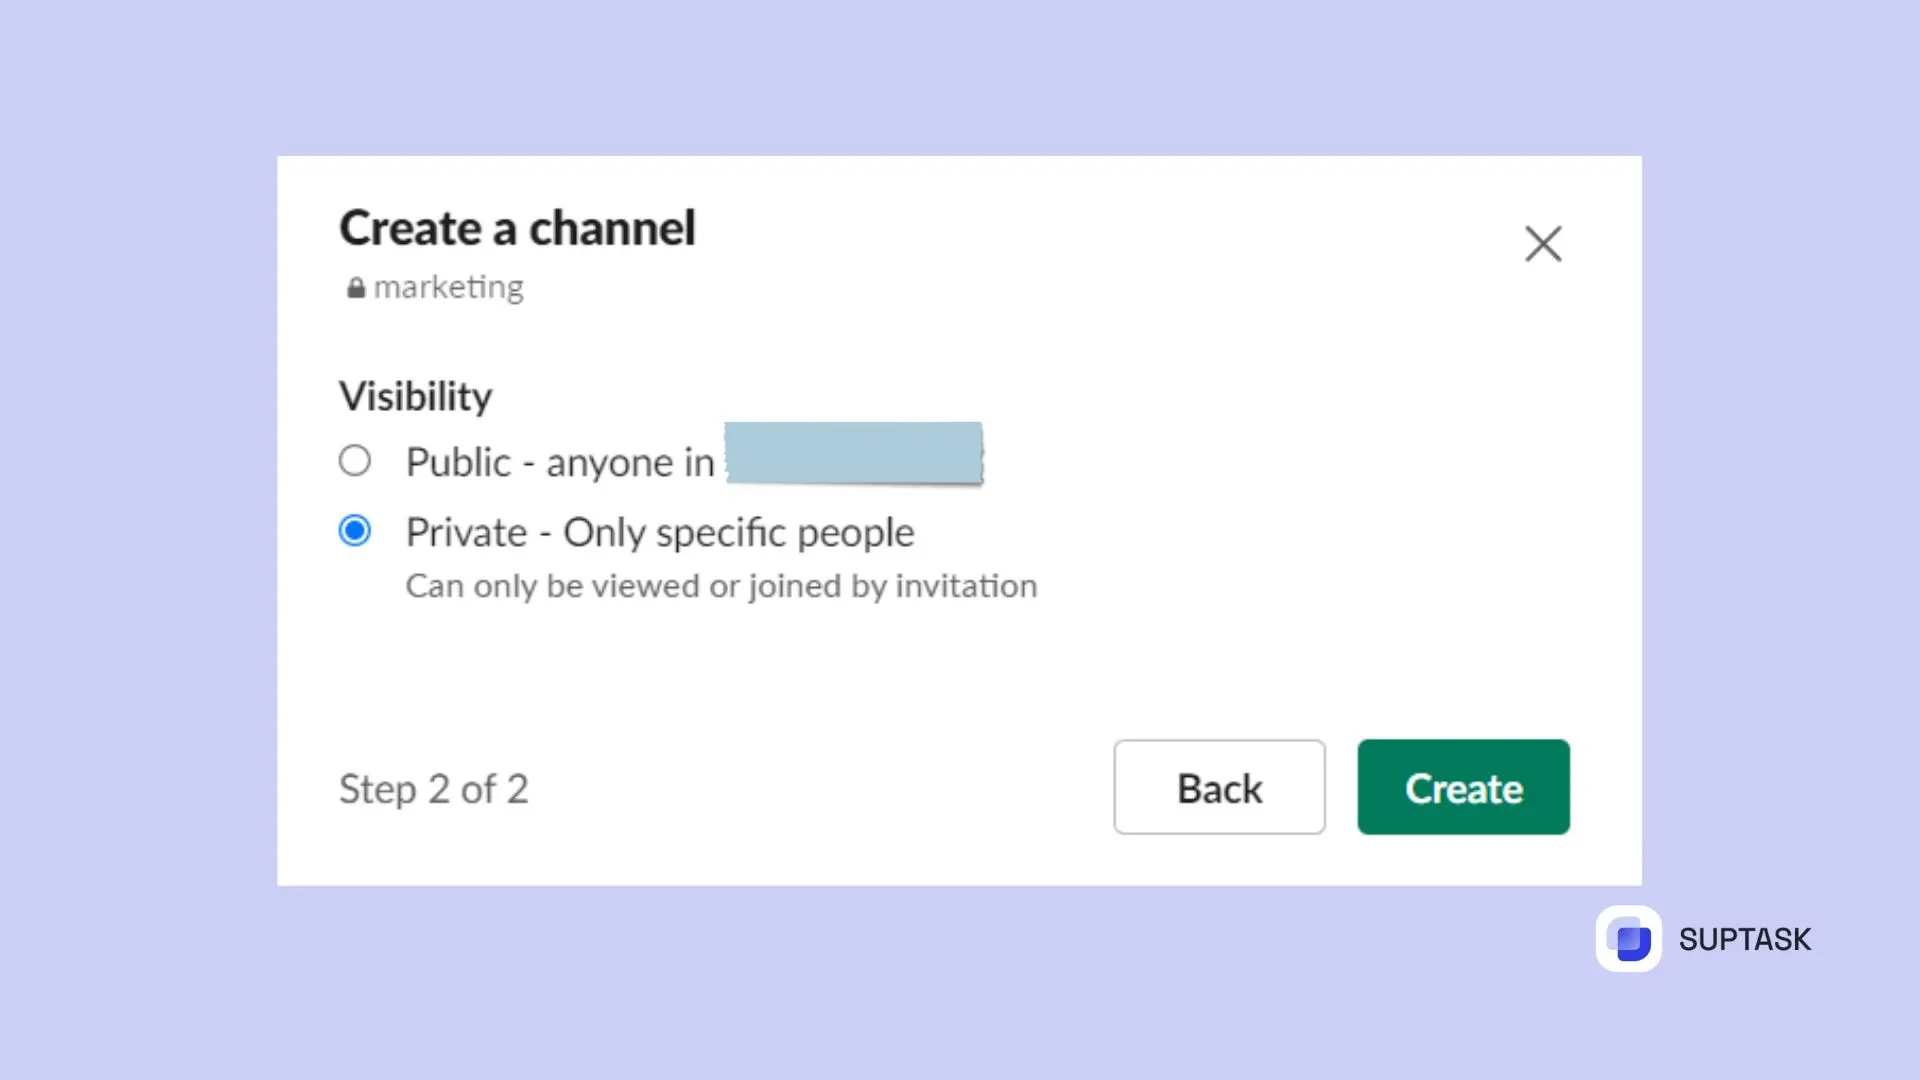
4. Click "Create". There you have it, your new channel.
Understanding Slack Channels
Slack channels work as groups within a Slack workspace, promoting cooperation and communication for teams. Their main task is to manage various chats for different projects, topics, or teams, and it's possible to make separate channels for these needs.
Slack doesn't set a maximum number of distinct channels you can construct, including public and private channels. For concentrated discussions and privacy, you can build a private Slack channel for certain team members. Whether you favor working on a desktop or mobile gadget, you're covered, as building channels can be accomplished on both.
Next, we’ll determine the contrasting points between public and private channels and instruct you on the methods for making Slack channels on desktop and mobile gadgets.
Public Channels vs. Private Ones
Public channels? Anyone on your team can join. They promote transparency and team collaboration. Private channels? Only if you're invited. They're great for confidential talks and keeping some information limited.
Got the title of workspace owner, admin, or channel manager? Then you can create private channels. Only the invited can see those. If you're not one of the privileged, ask an owner or admin for help.
No matter what you need, changing channel settings is a cinch. You can easily transform public channels into ones, or go the other way if needed.
Set up Your Channel the Way You Like It
Once created, you could change things to suit your team. Here are some steps to change the theme:
- Tap the channel's title to expose a pop-up.
- Pick "Edit" found in the Topic row.
- Type in the new topic.
- Click "Set topic."
Alongside channel's name a brief description is displayed in the channel header. This gives a snapshot of the channel’s purpose. To see this channel description, just steer your way to the sidebar on the left.
Also, handling user permissions within your channel is essential. Here's how you can do it:
- Find the channel in need.
- In the conversation header, click its name.
- Pick the Settings tab.
- In "Posting permissions," figure out who can post in the channel.
How to Craft a Brand-New Slack Channel on Mobile Devices
If you like using mobile devices, not to worry, the method to form a fresh Slack channel on Android and iOS is just as simple. Steps to create a channel on Android are as follows:
- Launch the Slack application
- Swipe your screen from left to right to show the sidebar
- Press the “+” sign next to “Channels”
- Add a channel by tapping the “+” symbol in a circle
- Fix the privacy level for the channel
- Give your channel a name
- Add a concise description (optional)
- Press “Create”
If you’re an iOS user, follow these steps to craft a Slack channel on your mobile device:
- Begin by opening the Slack application.
- Next to “Channels,” tap the “+” icon.
- Opt for “Create.”
- Type a channel name.
- Hit “Create” and you're done!
Good job! You've made a Slack channel on your phone!
How to Manage Slack Channel Members
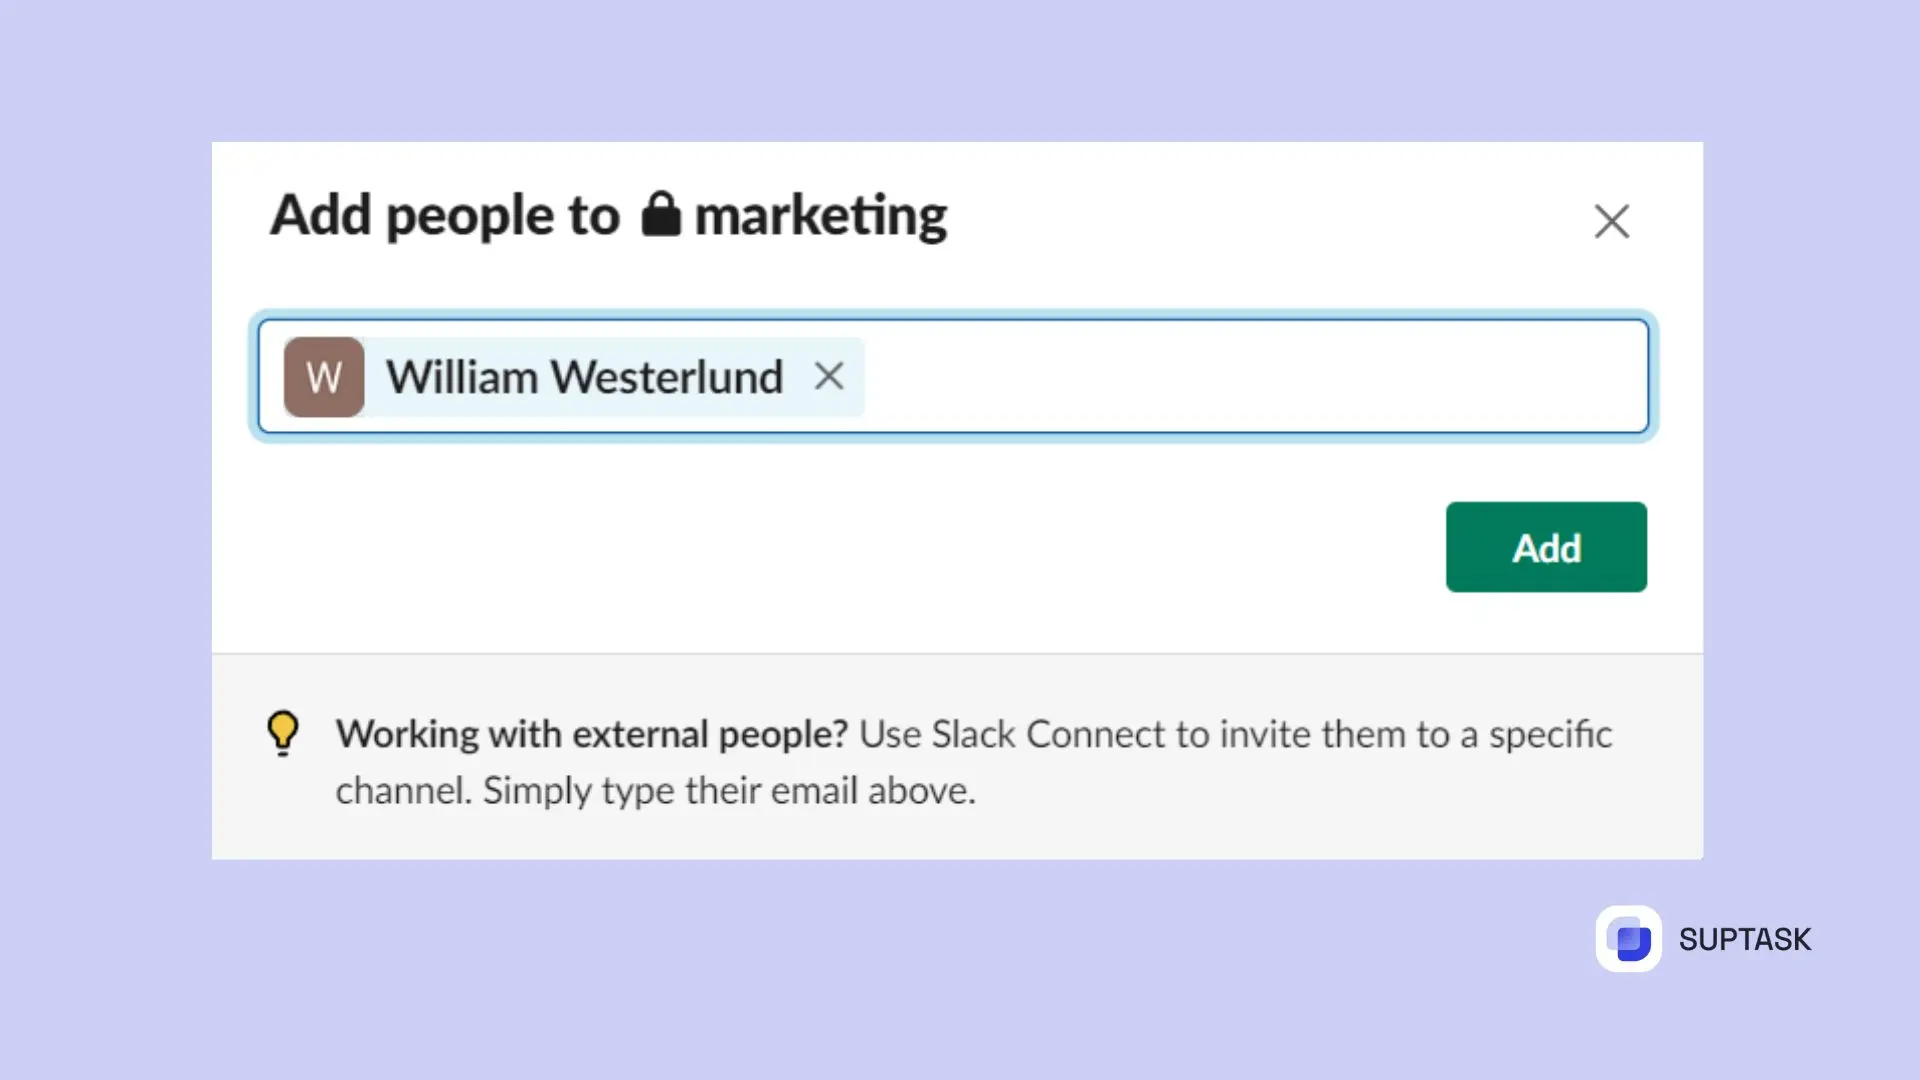
Want a neat, hard-working space? Good channel management is crucial. Follow these steps to invite members to a private channel:
- Go to the channel.
- Click the channel name at the top.
- Find the "invite members" button.
- Type the names of the members you want to invite.
- Make sure you confirm to add them to your channel!
Need to change a member's role in a Slack channel? Here's what to do:
- Choose your organization's name on the left side using the small arrow.
- Move over “Tools & settings.”
- Pick “Organization settings.”
- Press “People.”
- Choose “Manage permissions”.
You can use this method for all channels, even the secret ones.
Changing Public Channels to Private (or the other way)
Sometimes, you might want a public channel to be private. This can keep secrets in and others out. Here's how:
- Find the channel you need to alter.
- Press the channel name at the top.
- Search for the “make it private” button.
- Turn on the toggle switch.
- Don't forget to save the changes!
You're ready to go now—just look at the bottom right!
Turning a private Slack channel into a public one can't be done directly. But, you can still achieve this. How? Export the data from the private channel and then use this data to make a new public channel.
Packing Up and Getting Rid of Slack Channels
Occasionally, you might need to stash away or get rid of a Slack channel. Stashing—or archiving—a channel puts it to sleep, stops new messages but keeps everything there. But when you get rid of a channel by deleting it, you're wiping it out from your workspace, forever ditching its content.
Need an archived channel back? Do this:
- Open Slack and click on “Channels.”
- Find the archived channel in the search bar.
- Open it by clicking on the channel name.
- Get to the channel settings by either selecting the gear icon or the dropdown arrow.
- Click on “Unarchive” the channel.
Now, your channel’s back in the game!
A Ticketing System Could Be Your Channel’s Best Friend
When you link a ticketing system to your Slack channels, everyone on your team wins. Dealing with tickets becomes slicker. Team communication and working together gets a boost. You can pair Slack with these ticketing systems, for instance:
- Suptask
- Jira Service Desk
- Now Actions (for ServiceNow)
Add a ticketing system to your Slack channels and watch your team workflow speed up, collaboration skyrocket, and overall productivity soar through a halp ticketing system.
What's the process to create a shared channel in Slack?
Follow these steps to create a shared Slack channel. Choose 'Create shared Slack Channel' from the drop-down menu on the left. Decide who on your team should access it. Title the channel. Input the URL of another Slack workspace. Finally, hit the '+' at the bottom-right of your sidebar to set it up.
How do I alter my Slack channel settings?
Modifying your Slack channel settings is simple. Click the channel title for a pop-up menu. Select "Edit" in the Topic row. Alternately, hit the channel name in the conversation header and choose the Settings tab.