

The Slack-native Ticketing System
Your modern AI service desk tailored for your employees in Slack


The AI Service Desk built for your users.
Entirely inside Slack.
Employees ask for help where they already work. Support teams track, route, and resolve. All without leaving Slack.
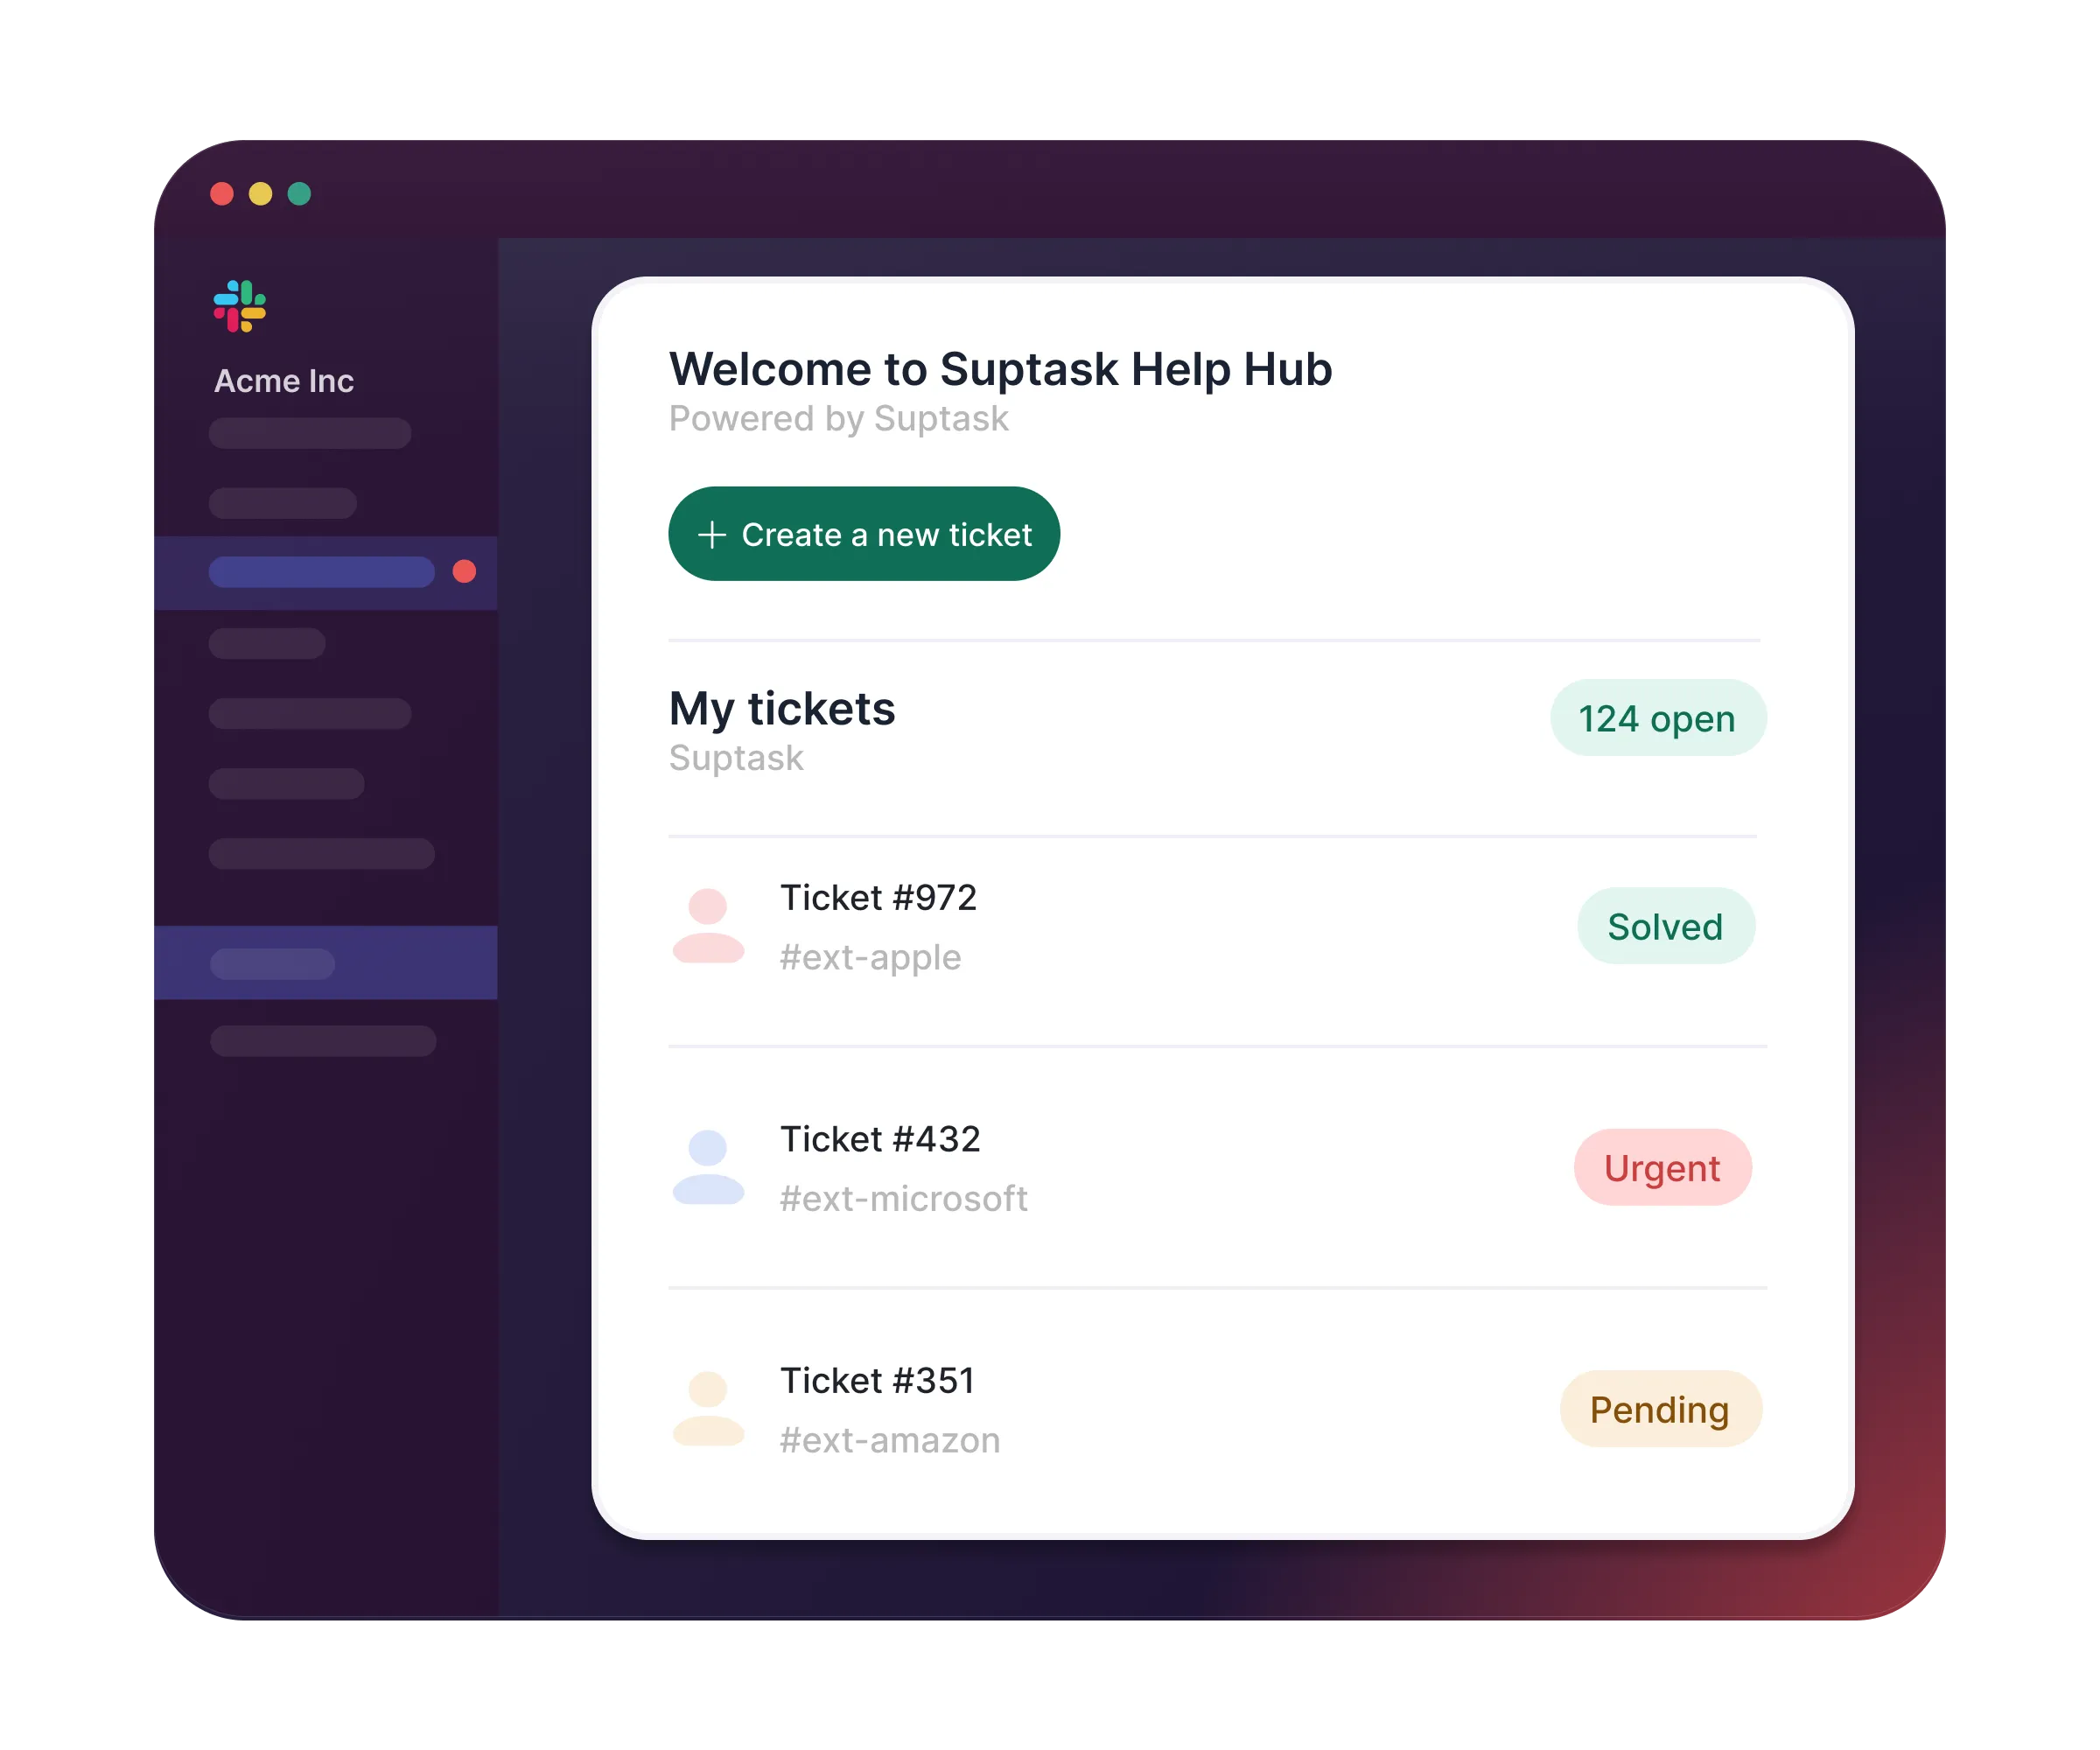
Your Slack Service Desk
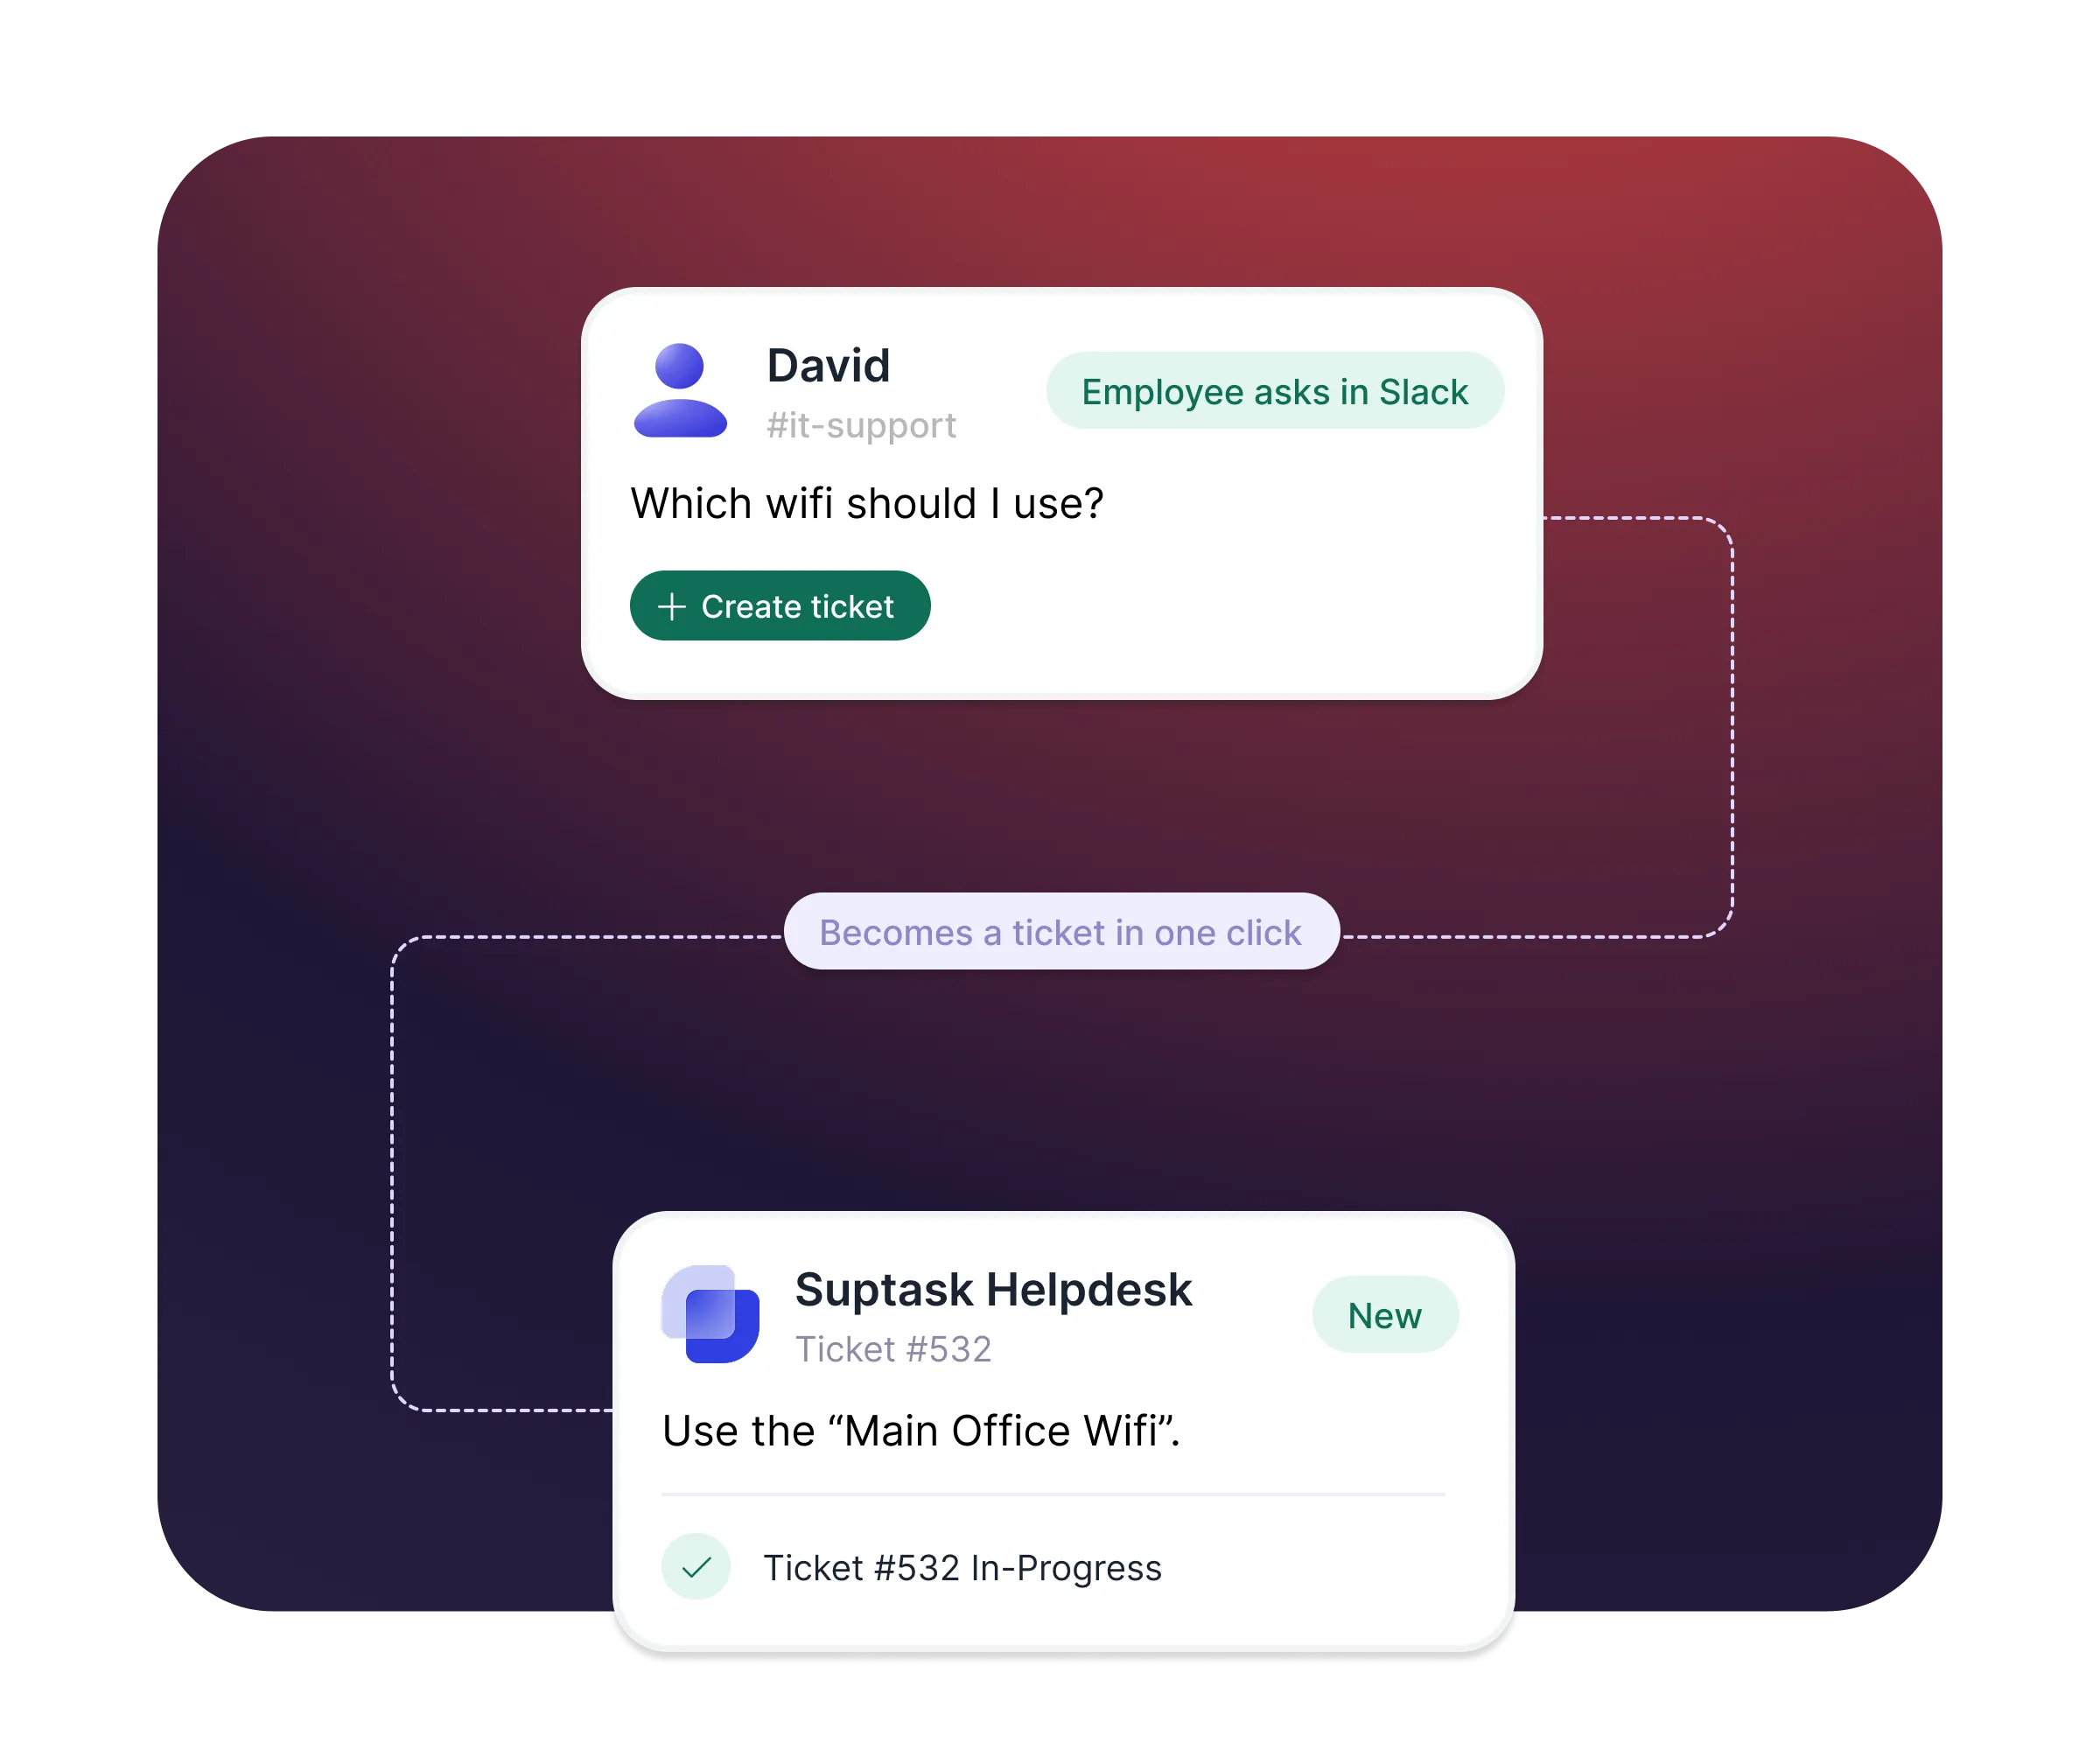
Capture requests from anywhere in Slack
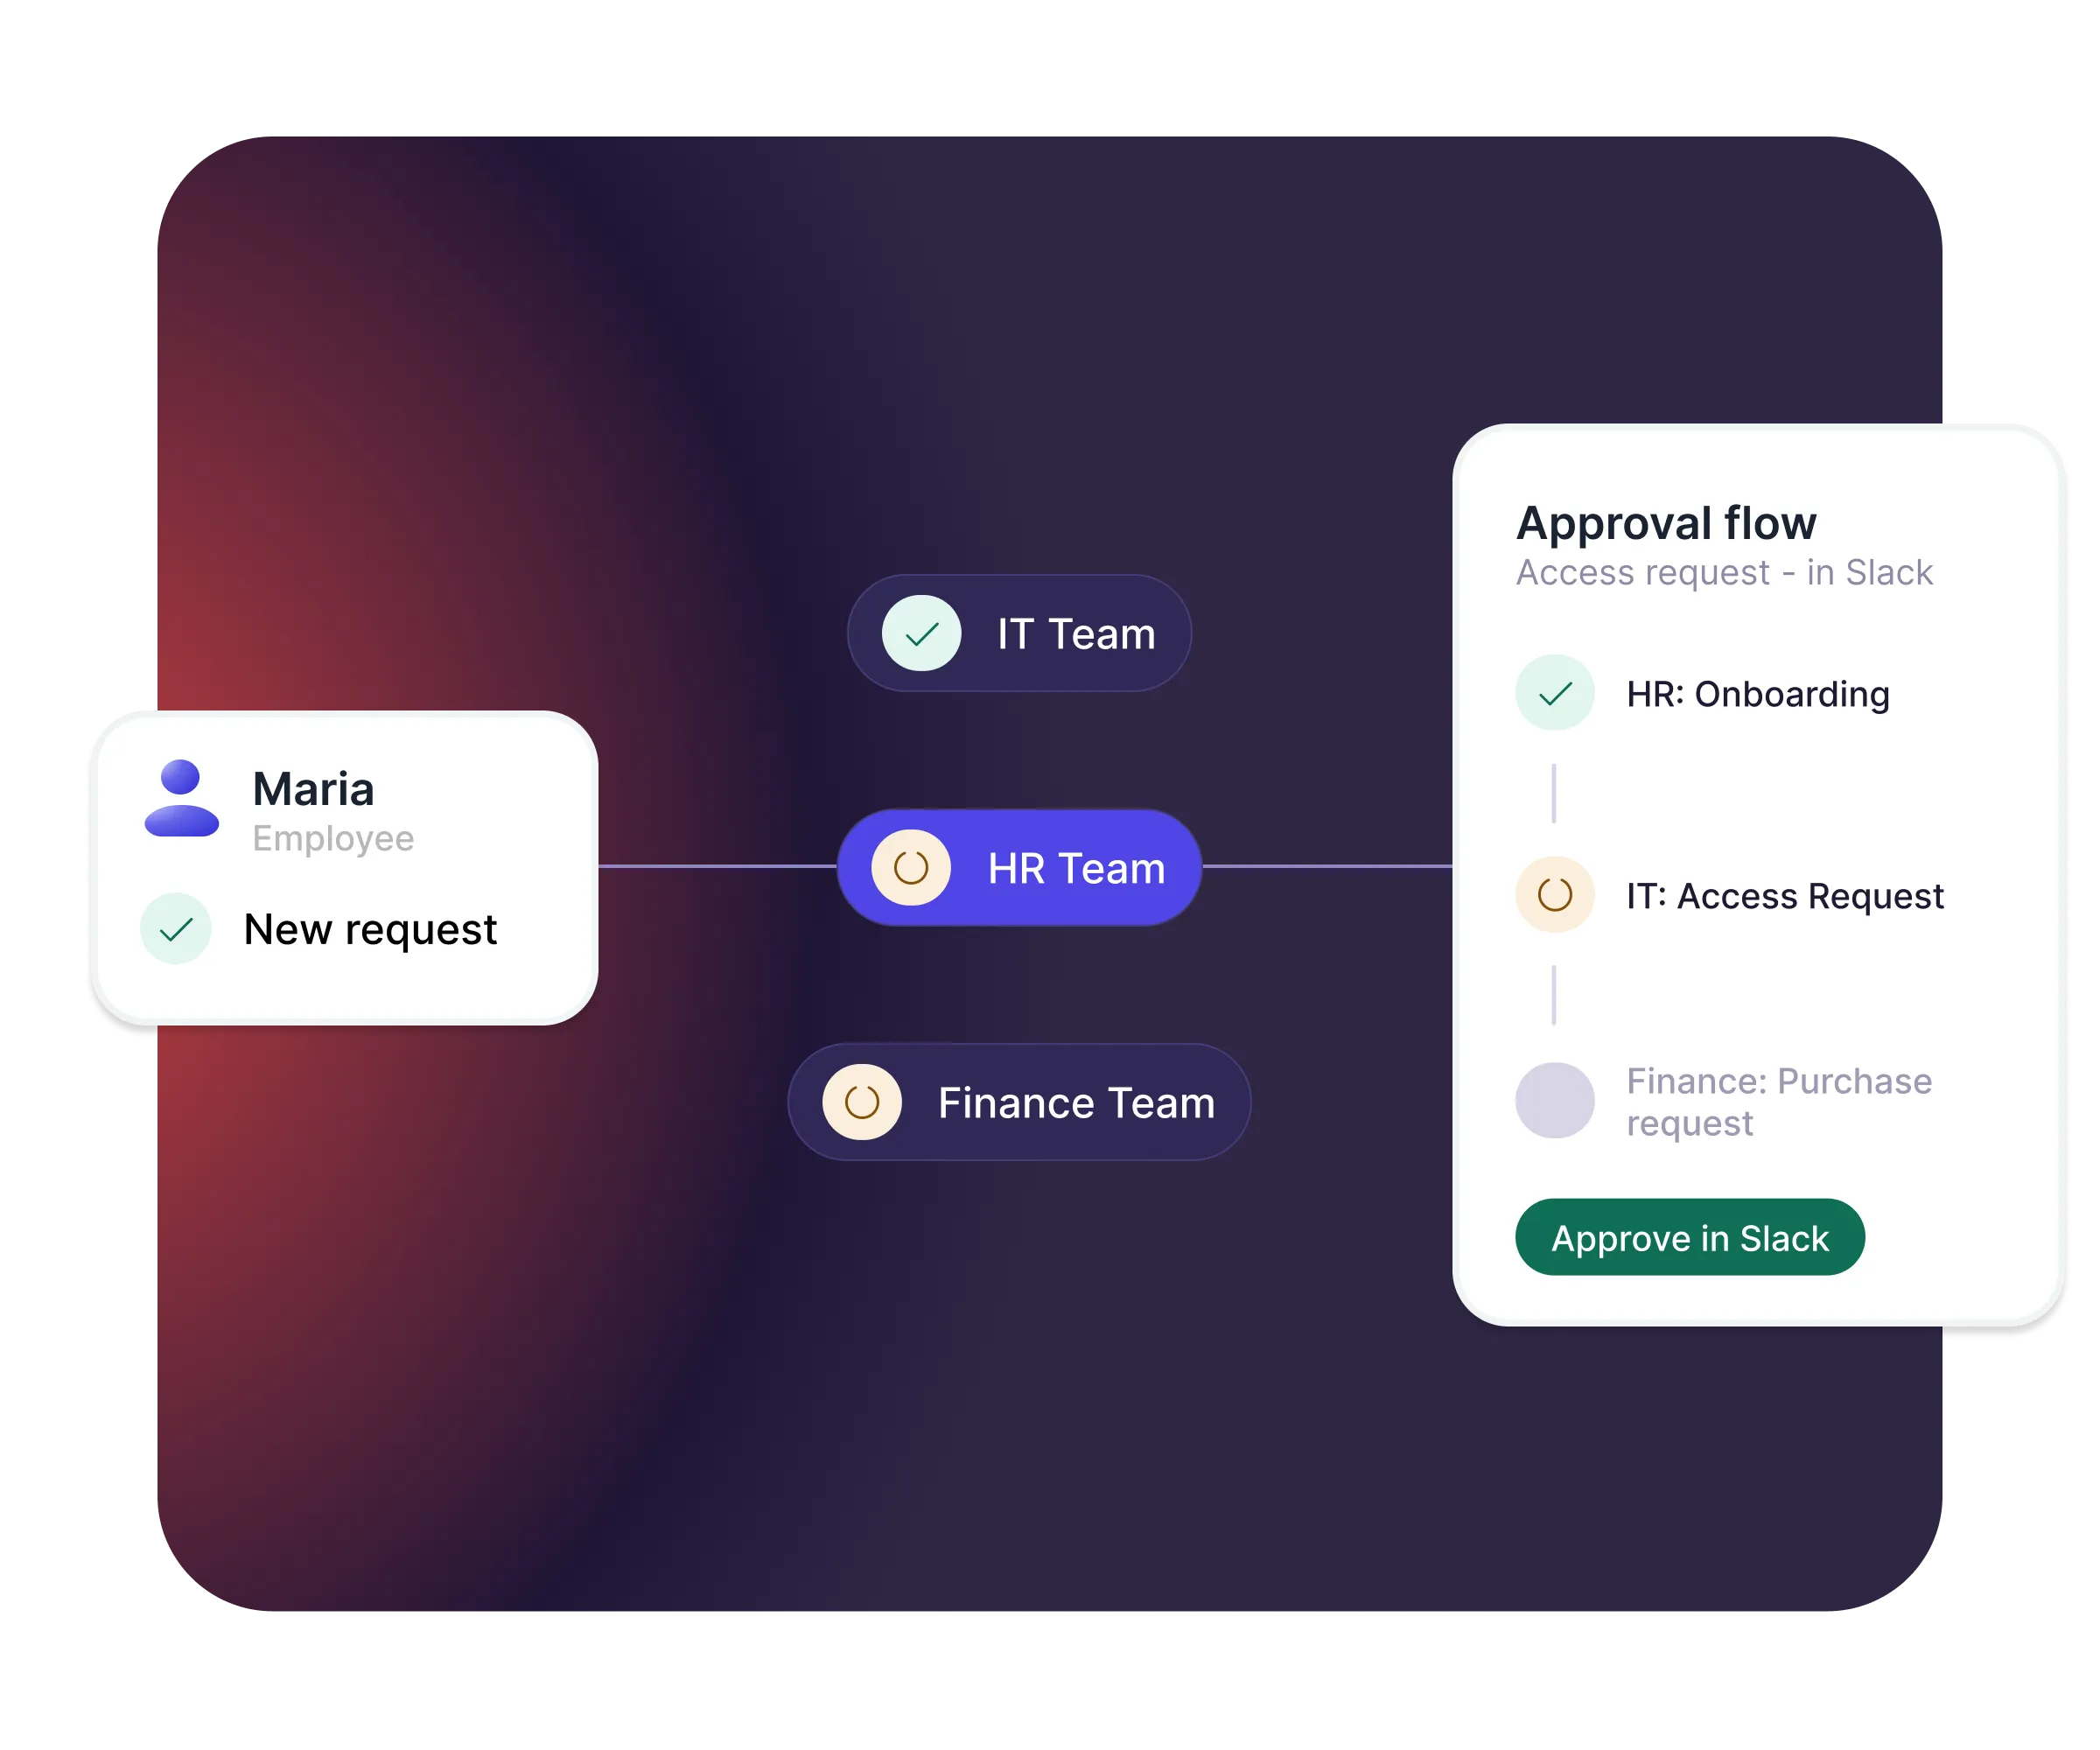
Smart routing for every team
Measure what matters
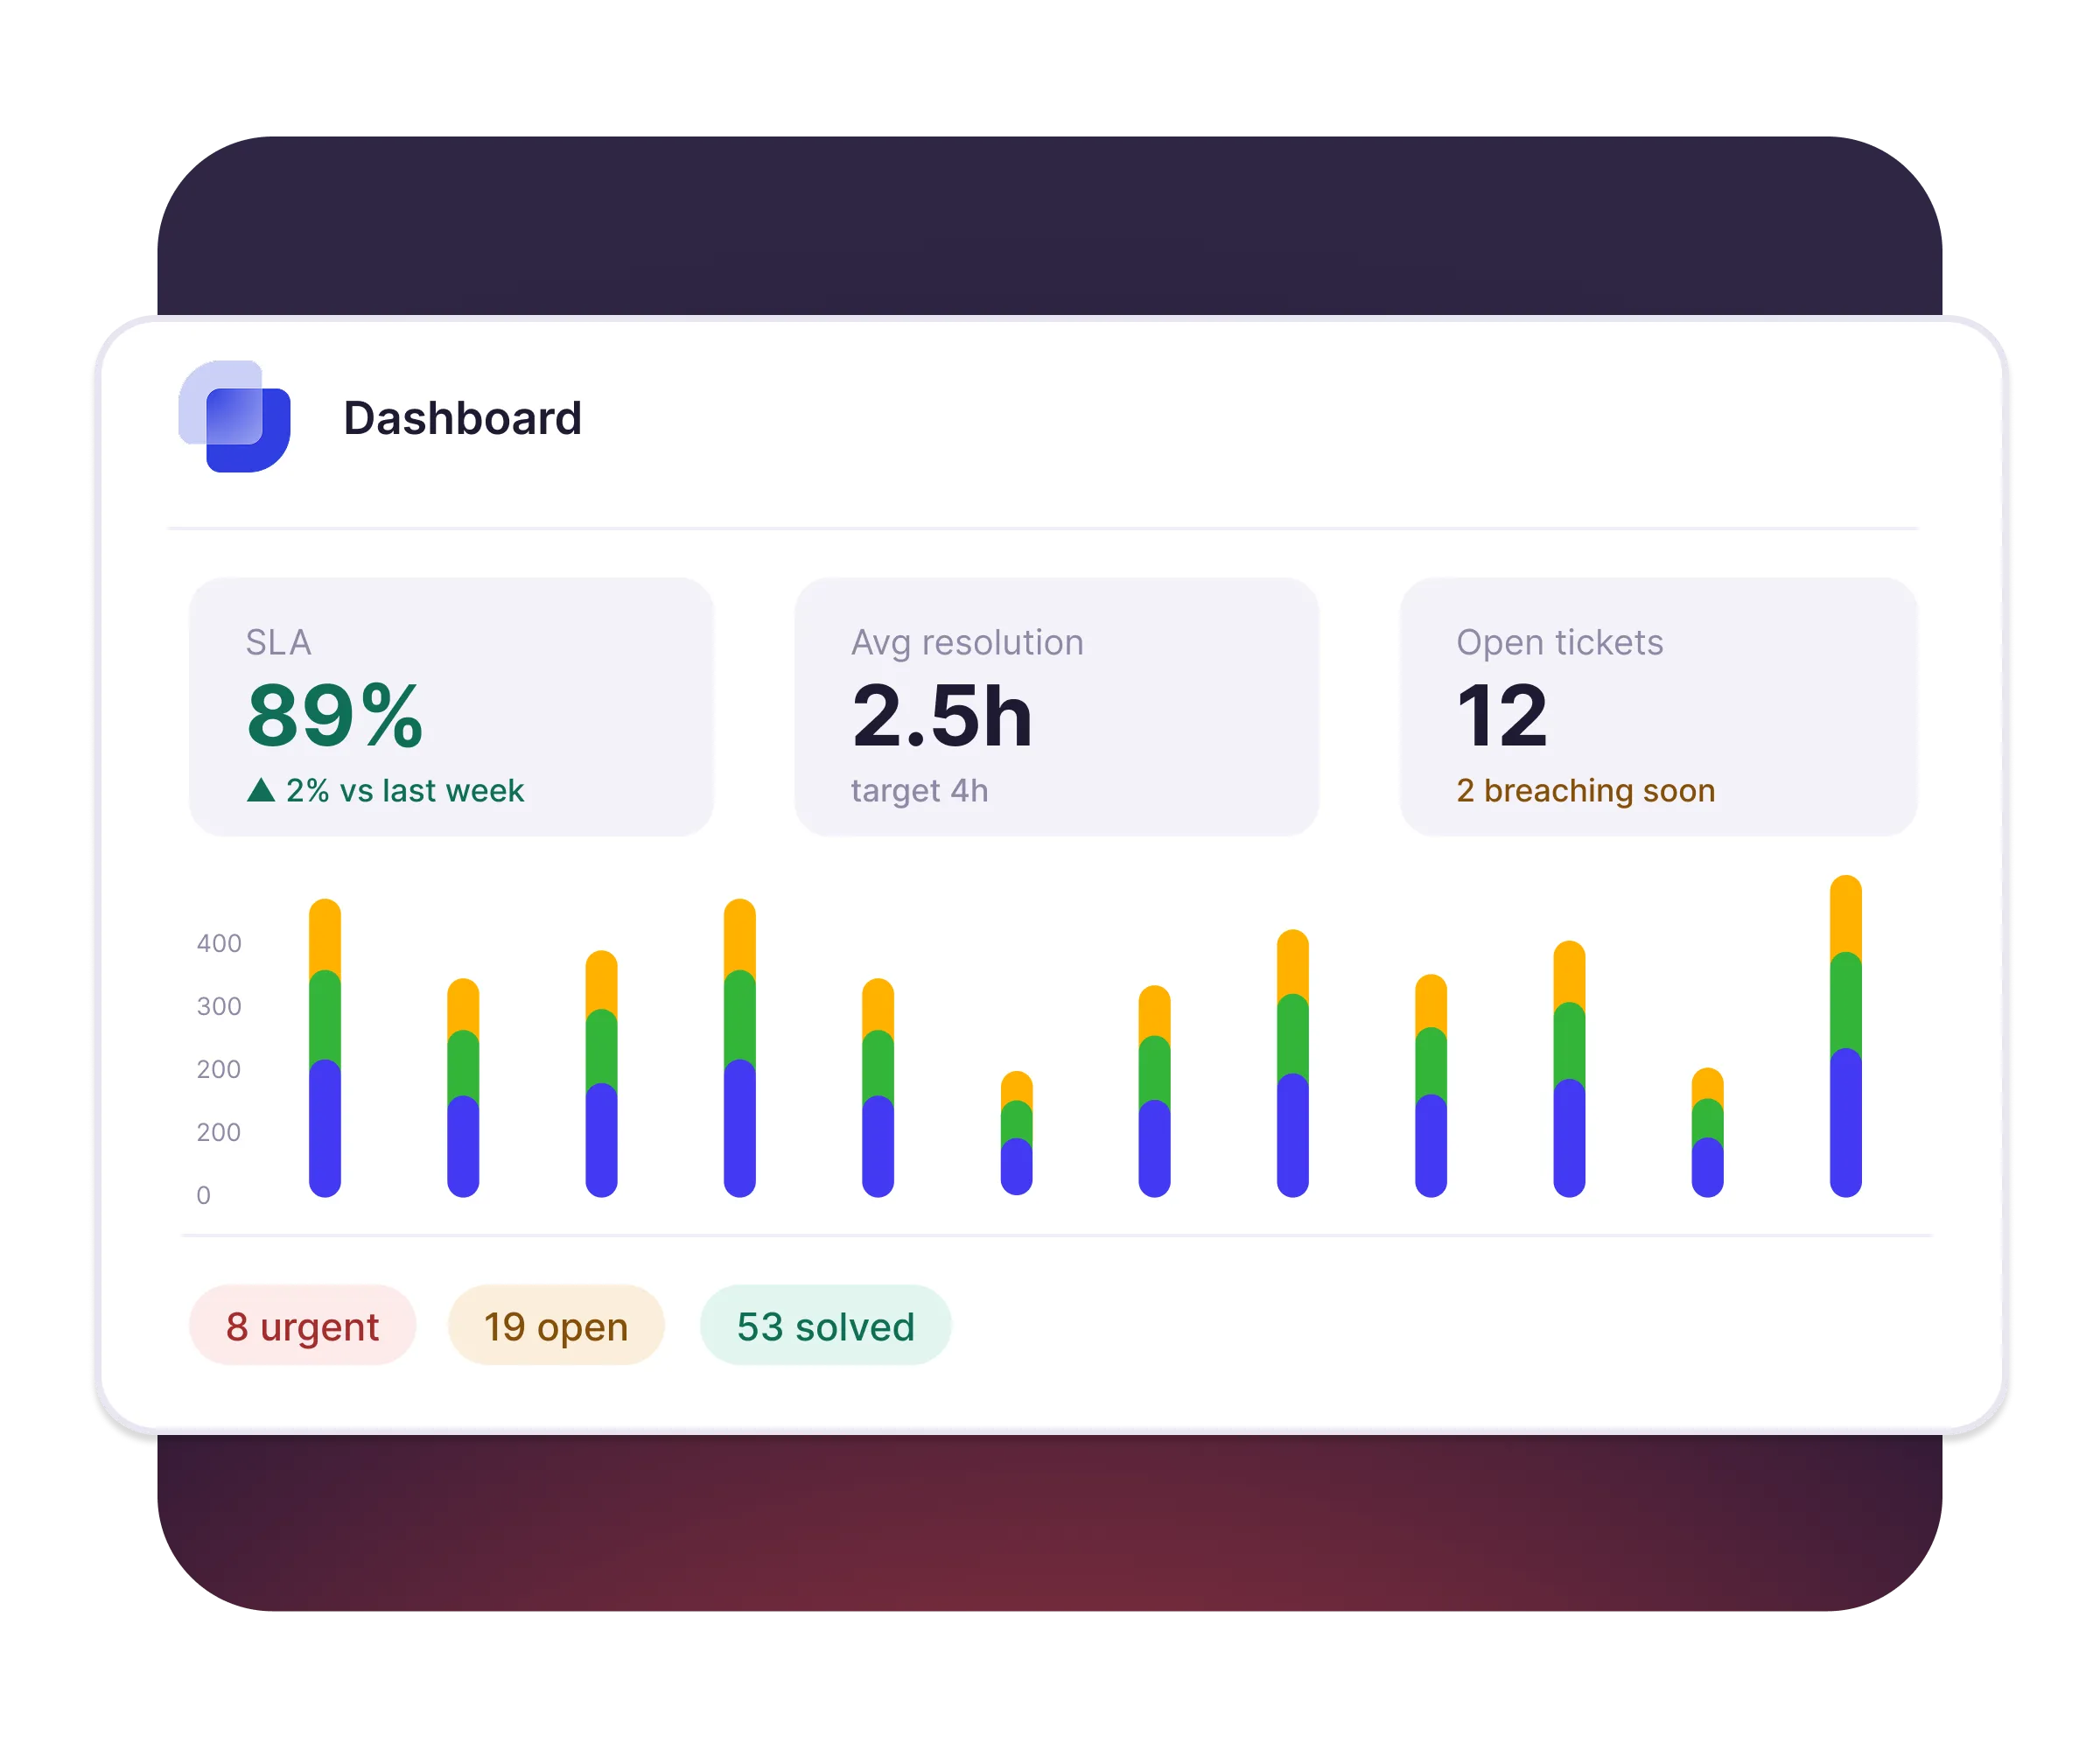
The numbers speak for themselves.
Save your team hours every week.
With an AI-powered assistant.
AI that resolves, triages, and routes so your team spends less time on tickets and more time on impact.
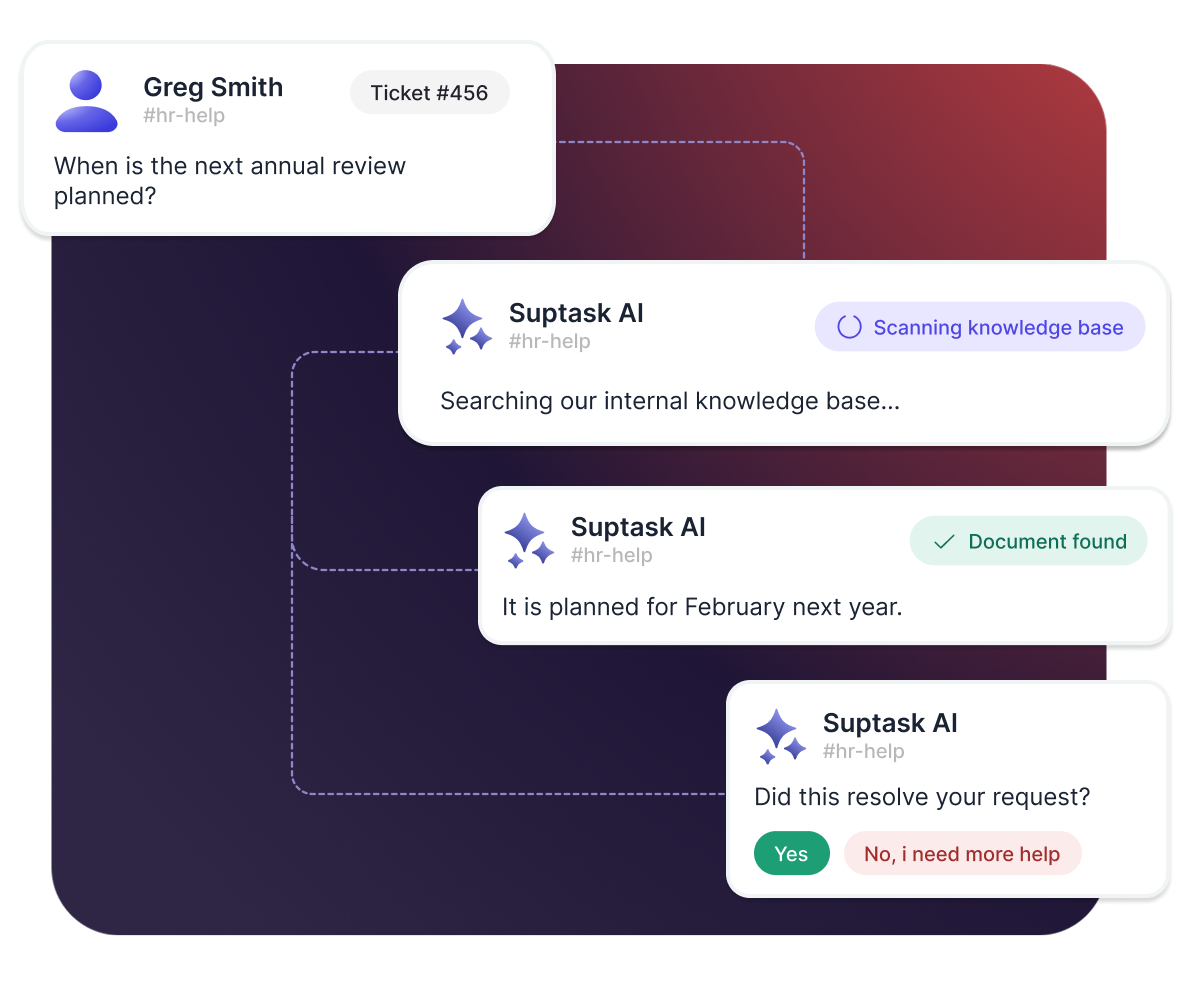
Resolve tickets faster with AI
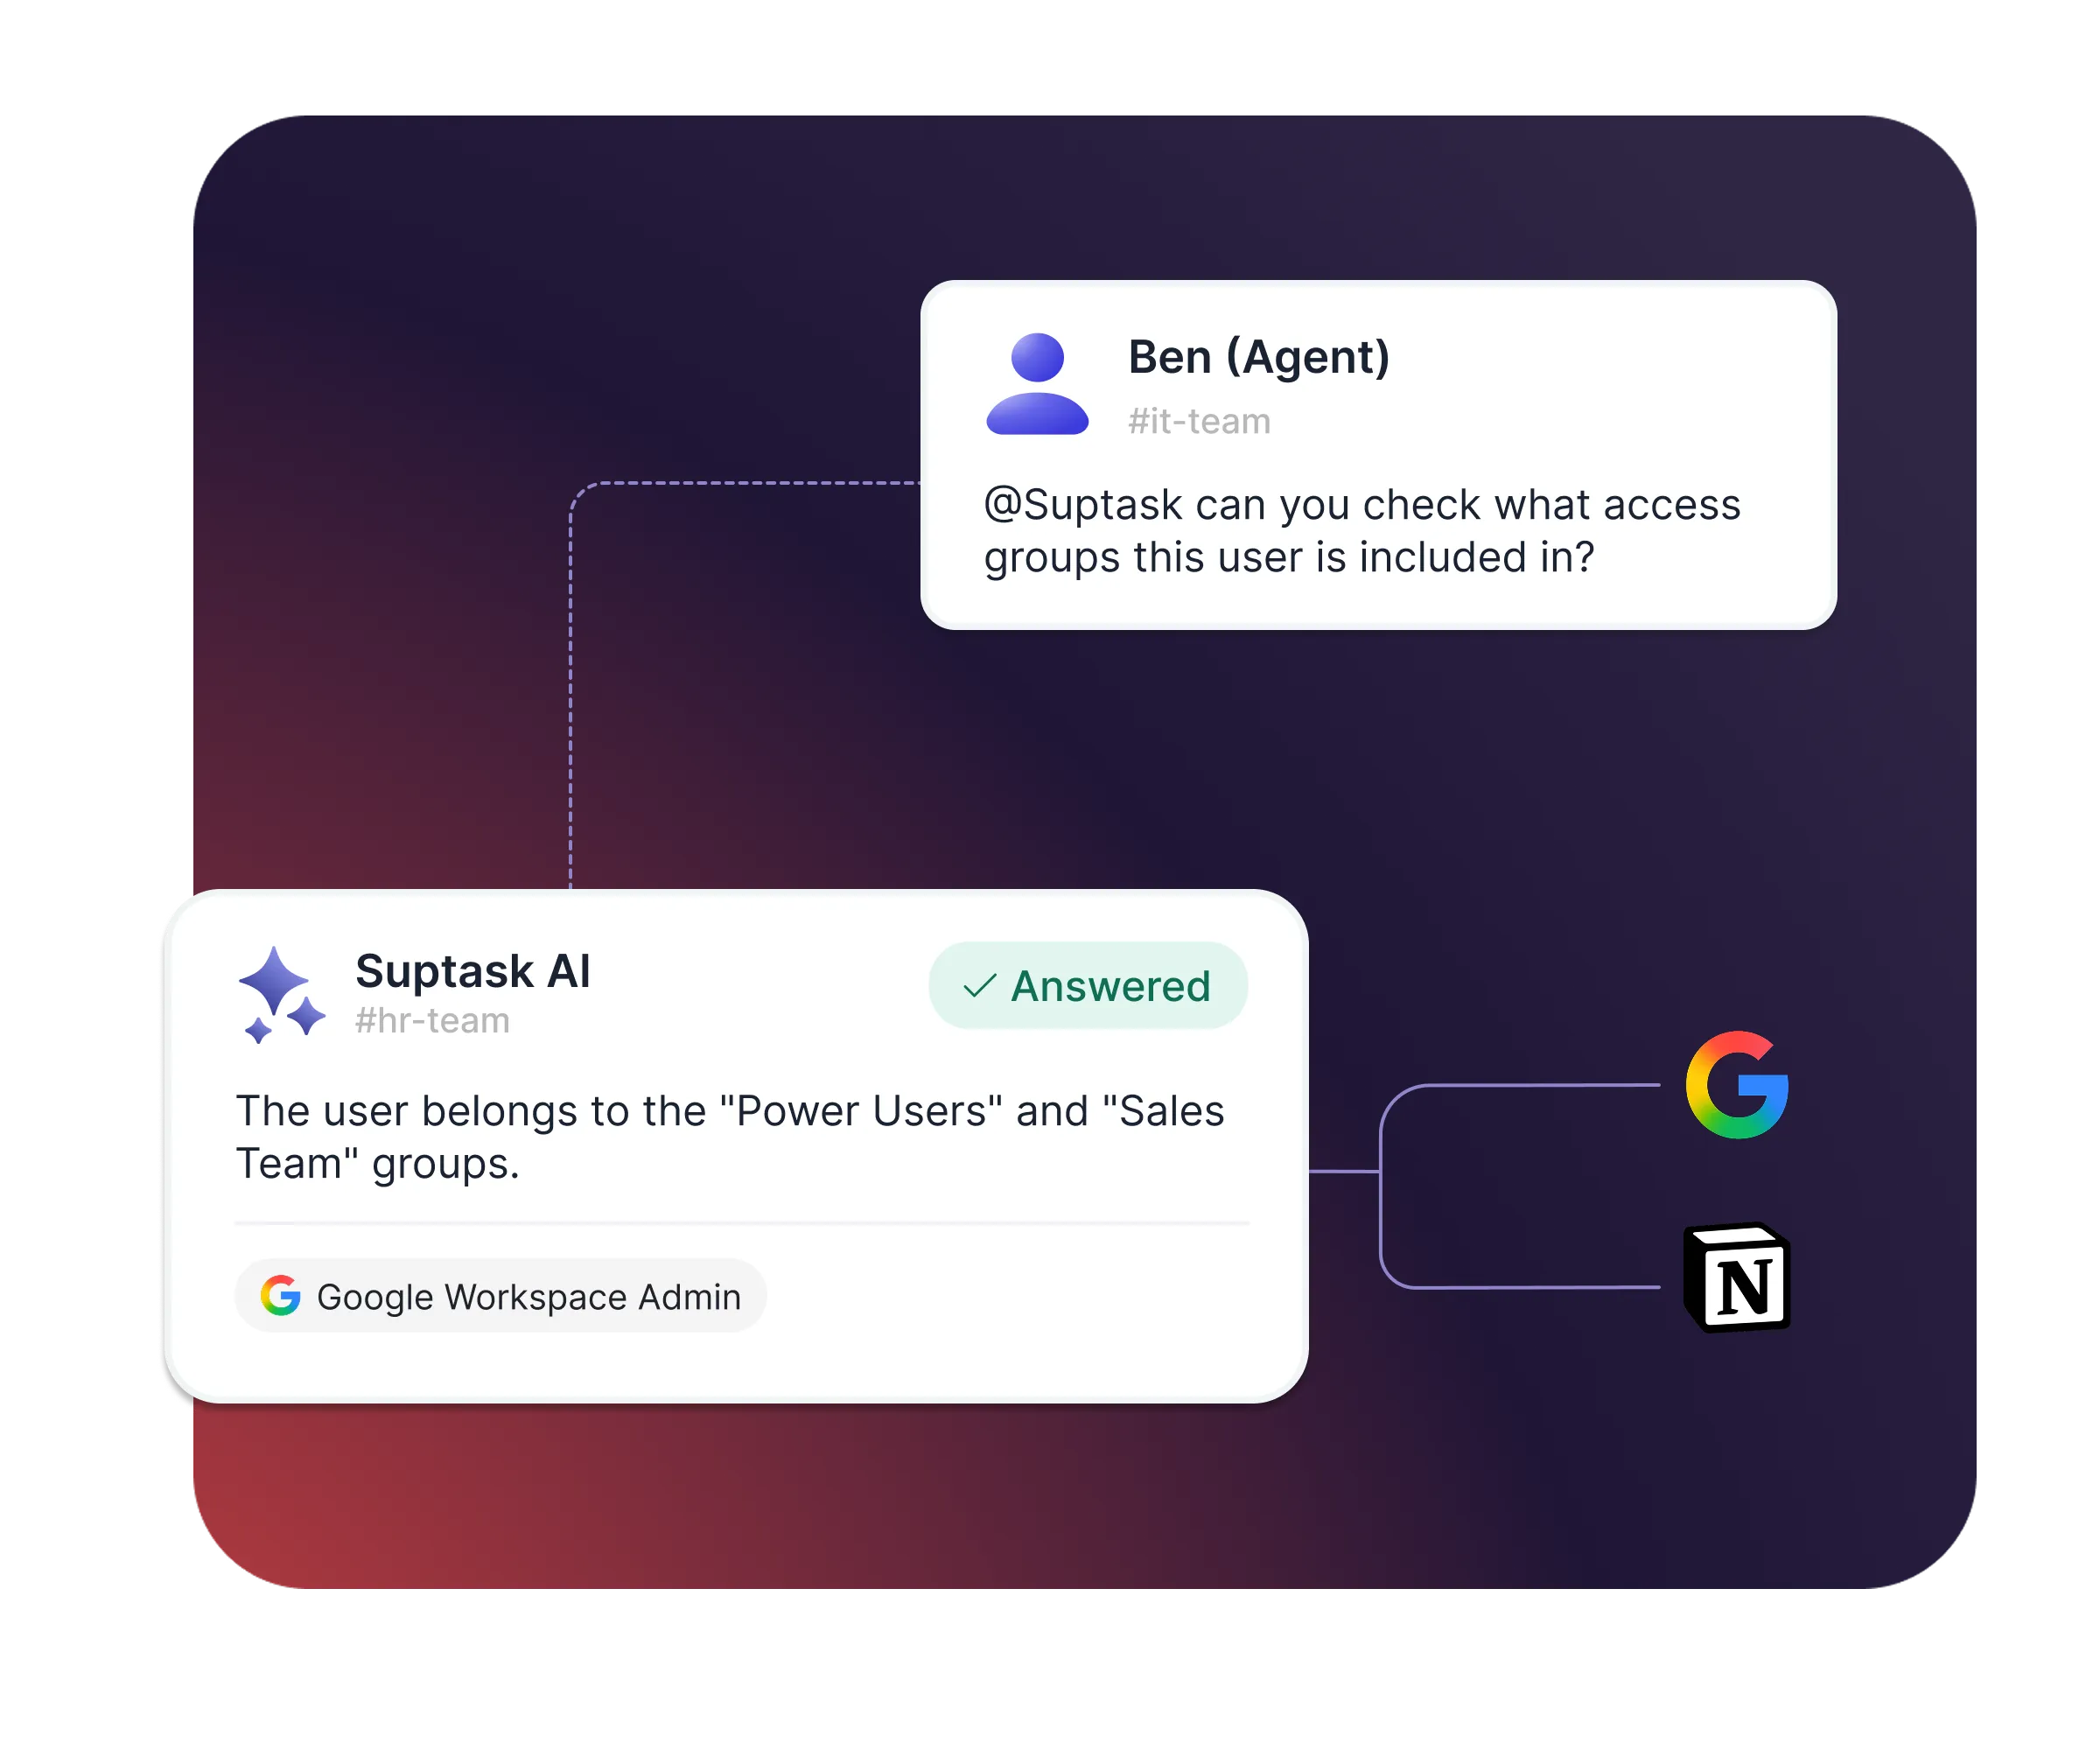
Your AI-assistant for agents
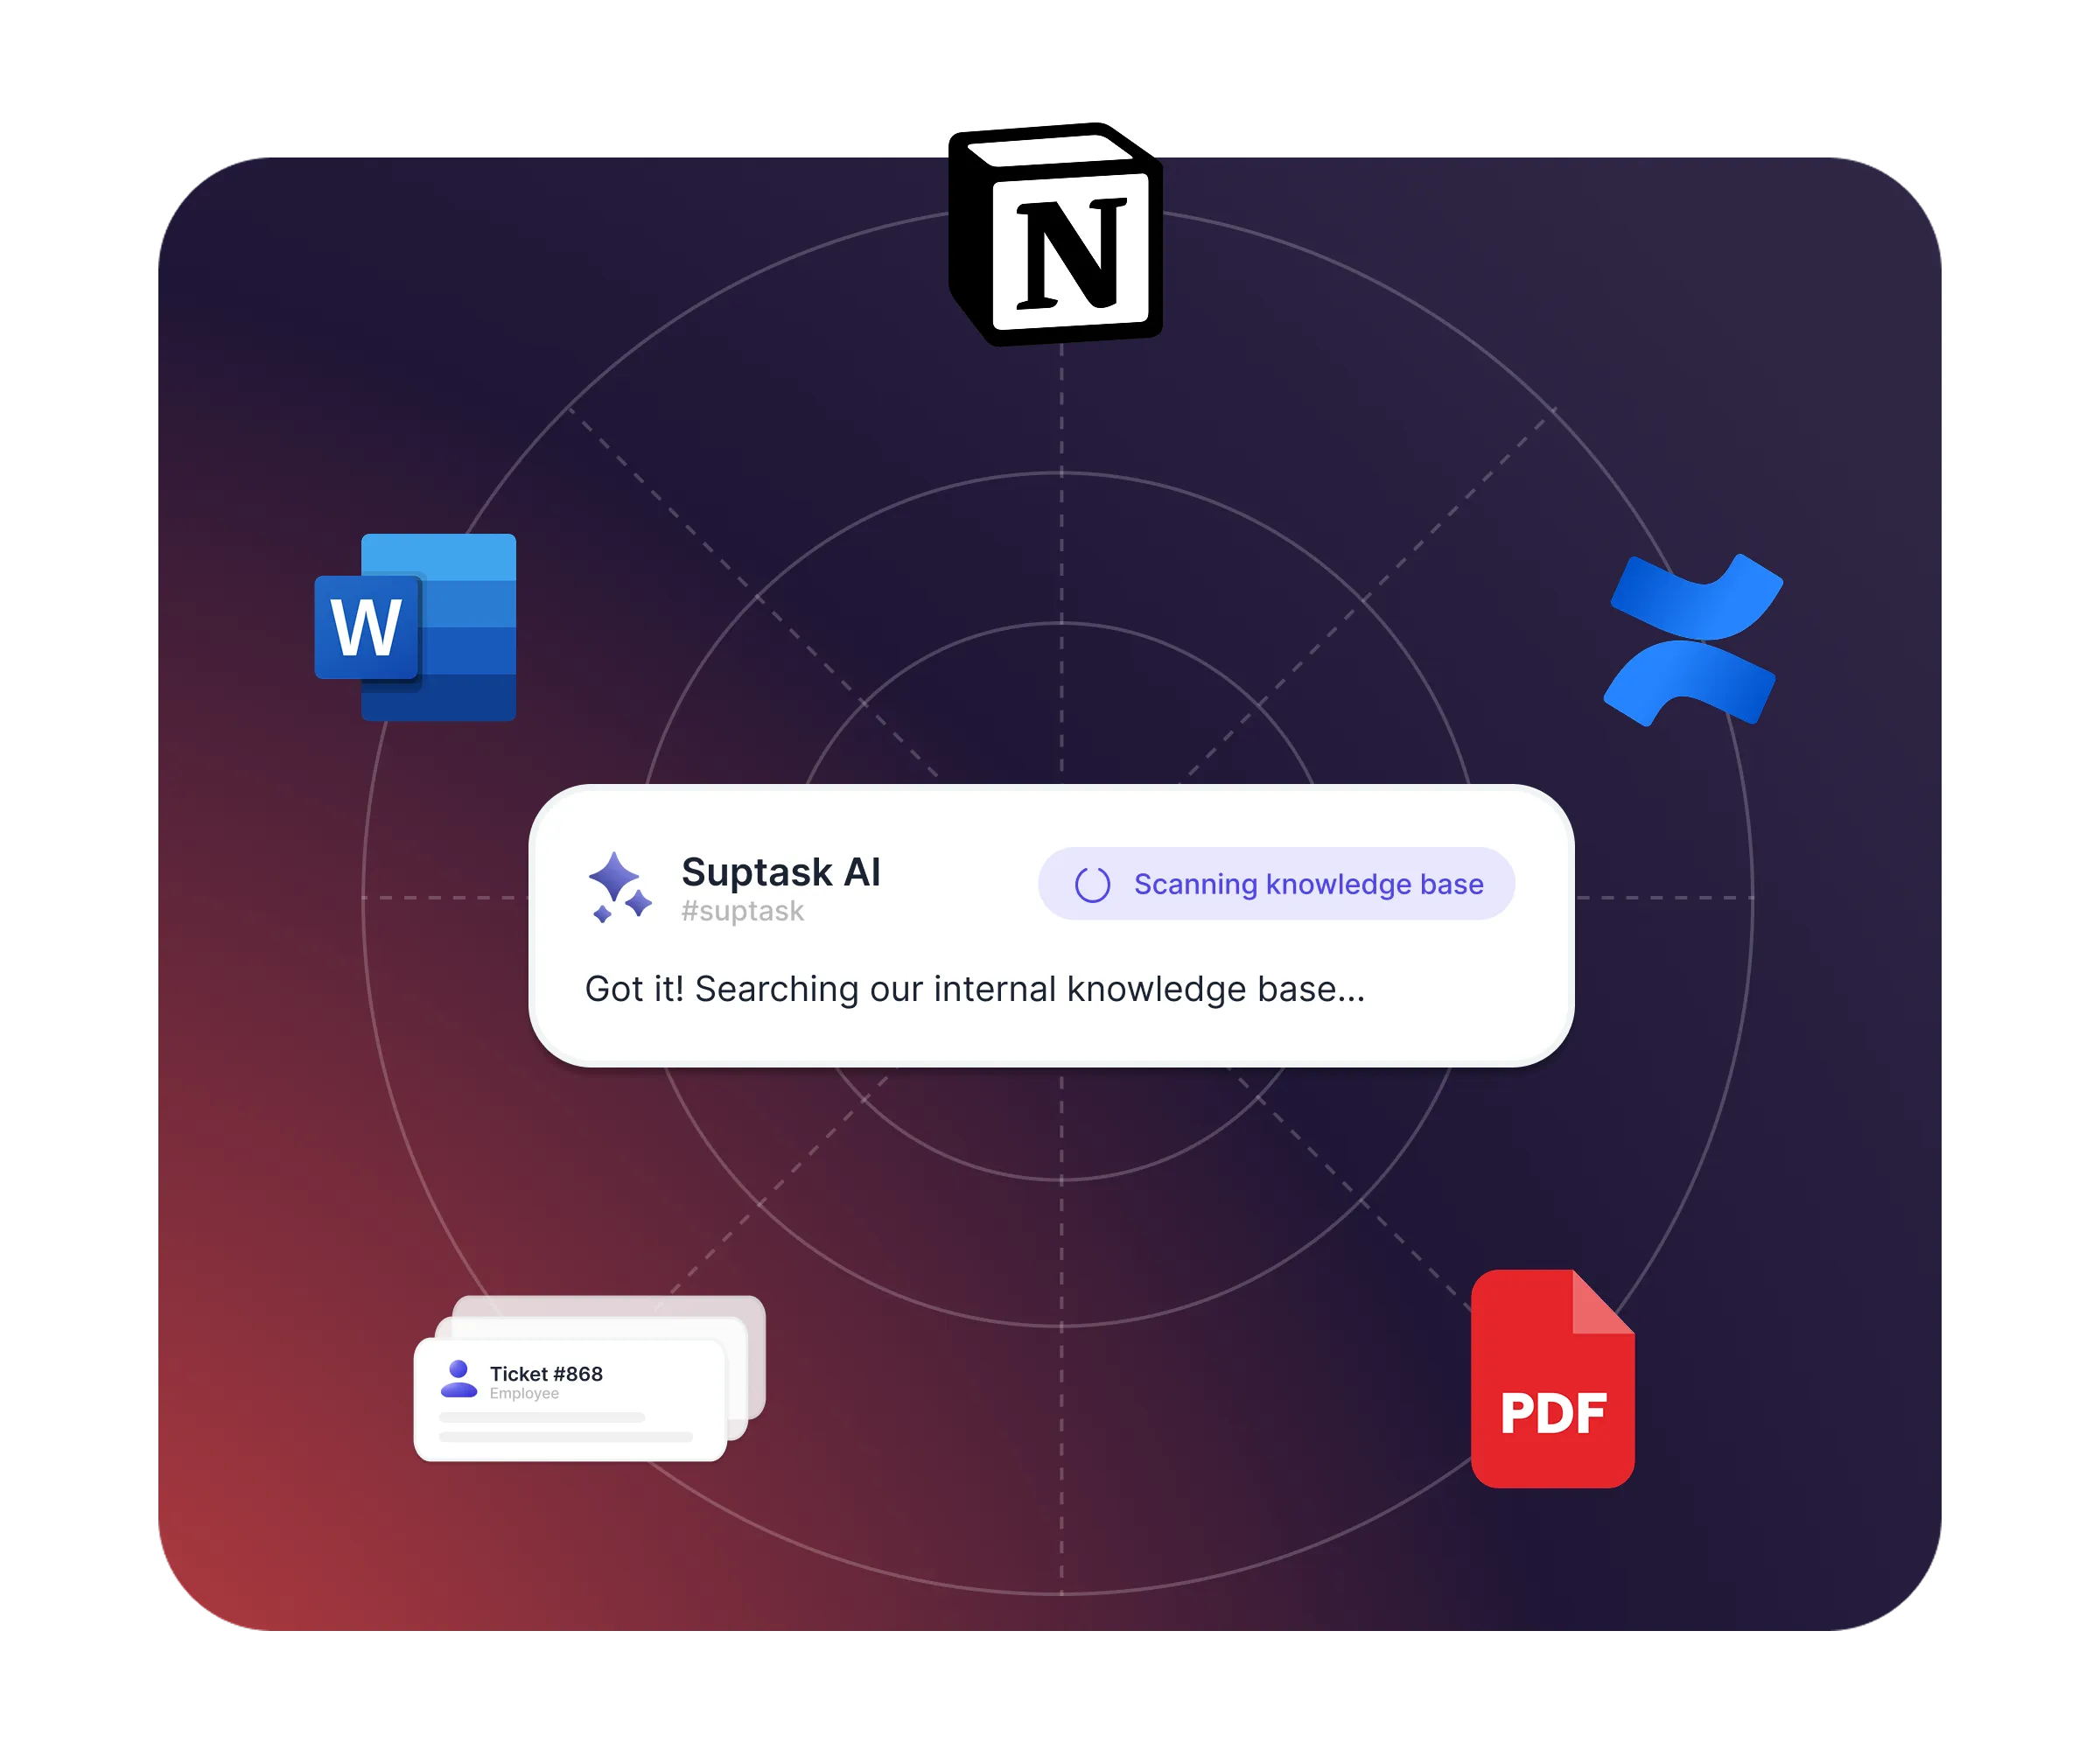
Powered by your own knowledge
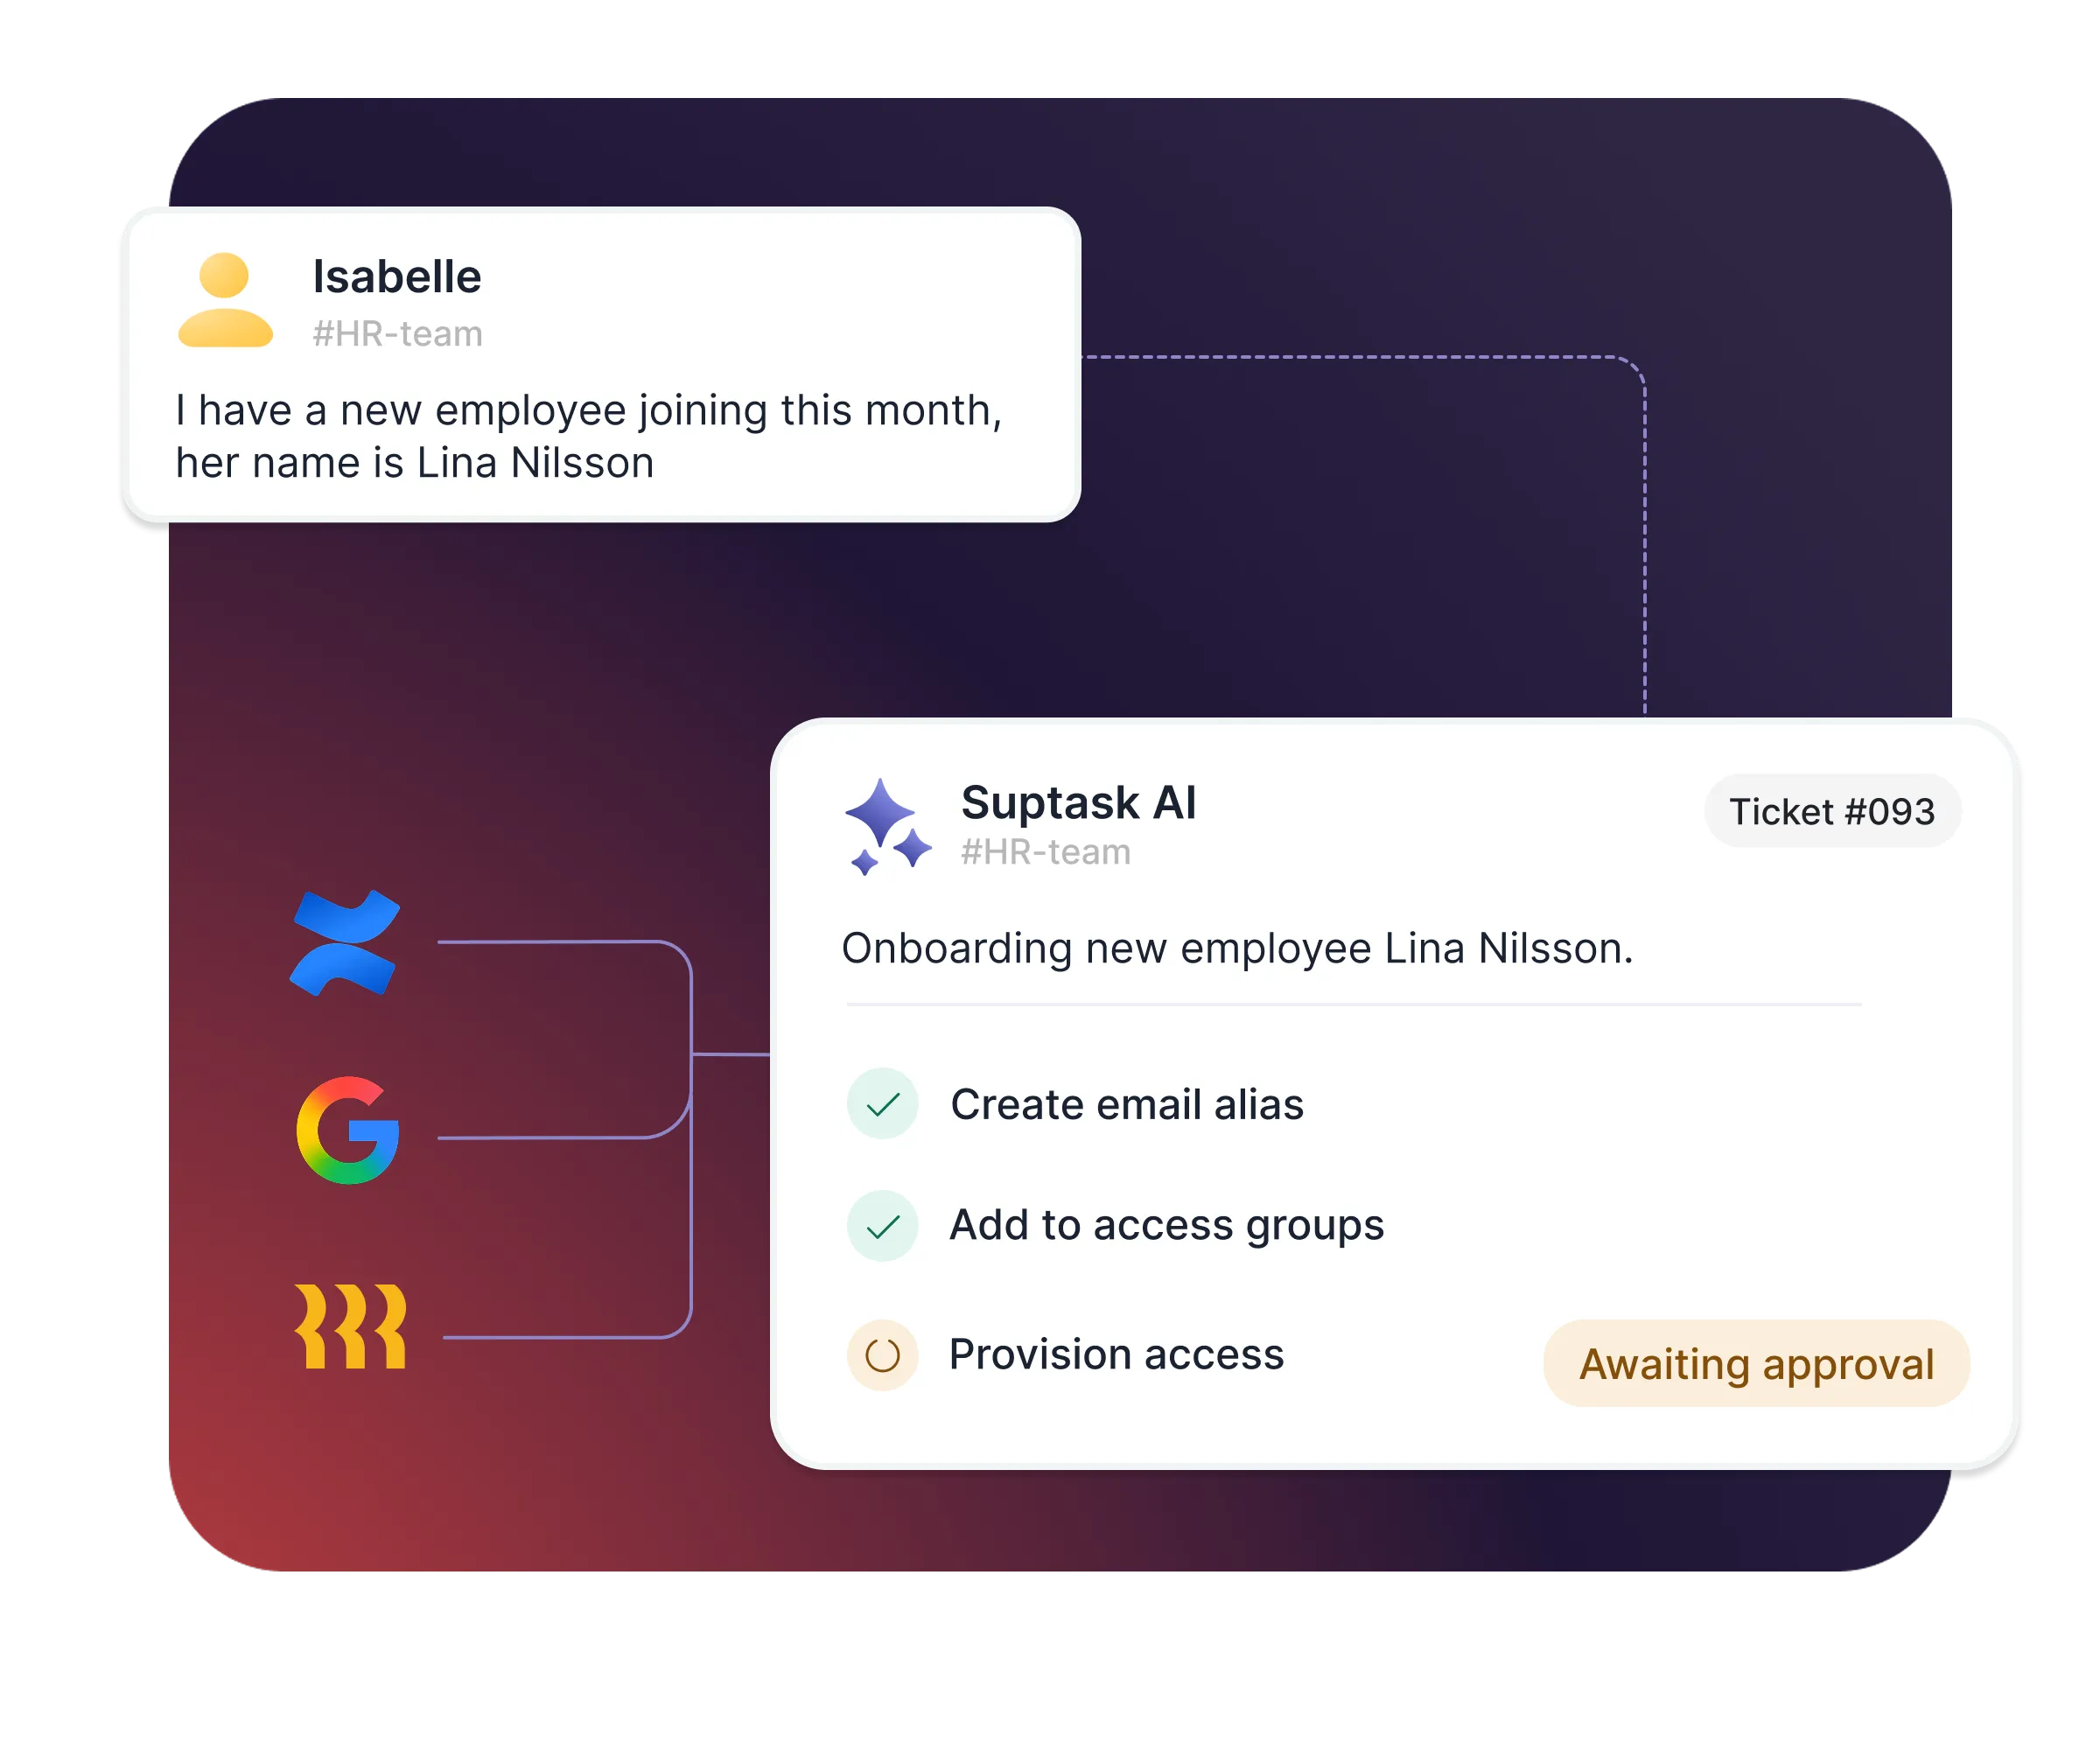
AI Agents that get work done
Already trusted by fast-moving support teams.
The platform has streamlined our ticketing workflow, leading to significant efficiency gains and saving our teams hundreds of hours each month”
Integrate your ticketing workflow with our Integrations
Turn Slack into a help desk your team will actually use
Frequently asked Questions
What is a Slack ticketing system?
A Slack ticketing system is help desk and service desk software that integrates with Slack. Any department, from IT and HR to Finance, can submit, track, and resolve internal requests without ever leaving their main workspace.
Using Slack as your help desk, your messages can turn into tickets, so you never have to leave Slack to manage your tickets.
Slack can also be used for Customer B2B Support, where each customer have their own dedicated Slack channel.
Yes, Slack can be used as a ticketing system by integrating dedicated apps like Suptask to Slack. This allows teams to create, track, and manage requests all in one place.
Suptask is built as a solution that works for any team.
We have proven examples across many organizations where teams such as IT (ITSM), Product, Engineering, Finance / Billing, Revenue Operations, Sales Operations, and HR are using Suptask to improve their ticketing experience on Slack.
To use Slack as a help desk, sign up to Suptask, then simply ask for help in a designated channel (e.g., #support), add a ticket emoji to any message - or use the Suptask App as your central service desk in Slack.
You are able to control tickets without leaving Slack. The set-up requires no knowledge of coding. Here's the procedure.
- If any new messages are automatically treated as tickets in Slack channels, automate ticket creation. Users can transform previous Slack messages into tickets by using a specific emoji (e.g., "🎫 ").
- Automate ticket assignments using rules. Tickets must be assigned to the appropriate persons or groups. Suptask offers round-robin assigning, the fewest-open-tickets rule, and keyword-based routing.
- Automate updates/notifications by automatically notifying requesters about their tickets, new tasks for agents, and responding in threads so that there is full transparency on status changes and resolution processes, etc.
You can create tickets from Slack from any conversation with multiple methods:
- Post in a Request Channel: Send a note to a channel called #it-support. Suptask will turn it into a ticket.
- Use an Emoji Reaction: React with a ticket emoji (like 🎫). Suptask will turn that message into a ticket.
- Use a Slash command: Write /suptask or /helpdesk to create a ticket anywhere in Slack.
- Message shortcut: On any message, select the short "Create a ticket" from Suptask to turn it into a ticket.